

In scheme-based affiliate campaigns, videos featuring a presenter are used to keep users in the funnel and encourage them to make a deposit. Hiring actors or outsourcing the design work is expensive and slows down campaign launches, especially when you need plenty of source material to test different approaches. AI tools let media buyers produce creatives themselves, generating characters for different tasks without depending on contractors.
AI tools can bring the production cost of a video down to a few cents and speed up campaign launches. This article looks at creating deepfakes on local hardware and in the cloud, compares tool prices, and provides a step-by-step guide to animating still photos.
Generation Methods: Cloud Services vs. Local Hardware
Your choice of setup depends on the scale of your campaigns and your starting budget. Affiliate teams generally take one of two approaches: building their own hardware setup to run demanding software, or using cloud computing resources.
Local Software: Faceswap and DeepFaceLab
Local software suits teams that handle large volumes and plan to generate hundreds of source clips a week. The main requirement is an NVIDIA graphics card with CUDA support. For reliable operation in 2026, you will need a setup such as an RTX 3080 or RTX 4090 with at least 12 GB of VRAM.
The main advantage is independence. You are running open-source code that does not restrict the subject matter of your videos. You can use scripts about hacking algorithms or gaming strategies without worrying about account bans.
Once you have bought the hardware, the production cost per video falls to zero. However, getting started requires an investment of $1,500–3,000 per computer. You also need to be comfortable using the command line and configuring Python libraries.
Cloud Services: HeyGen and Synthesia
Platforms with ready-made avatars are useful for producing audience warm-up videos and quickly assembling UGC content. In 2026, HeyGen’s Creator plan costs $29 a month. It includes 200 credits, equivalent to 10 minutes of finished video when using the premium Avatar IV model. That works out at $2.9 per minute within the allowance, while each additional minute costs $5. Custom photo avatars made from your own source images offer a way around the restrictions. Although the official rules prohibit using public figures’ faces without consent, technical workarounds allow these filters to be bypassed during testing.

These services may suspend accounts over aggressive scripts, but neutral wording can keep cloud platforms viable for campaign production. The main drawback is the high cost per minute as campaigns scale.
Renting GPU Capacity through RunPod
Buying hardware for demanding AI models requires an investment of $2,000–3,000, which often makes little sense during testing. RunPod lets you rent GPU capacity such as an RTX 4090 or H200 and pay only for the time the GPU is in use. This removes the need to buy components and lets you start rendering from your browser.
The main advantage of this approach is the absence of content restrictions. Unlike mainstream cloud services, the RunPod and ComfyUI combination supports NSFW encoders. This allows prompts to include stacks of cash, casino logos, or app interfaces without restrictions.
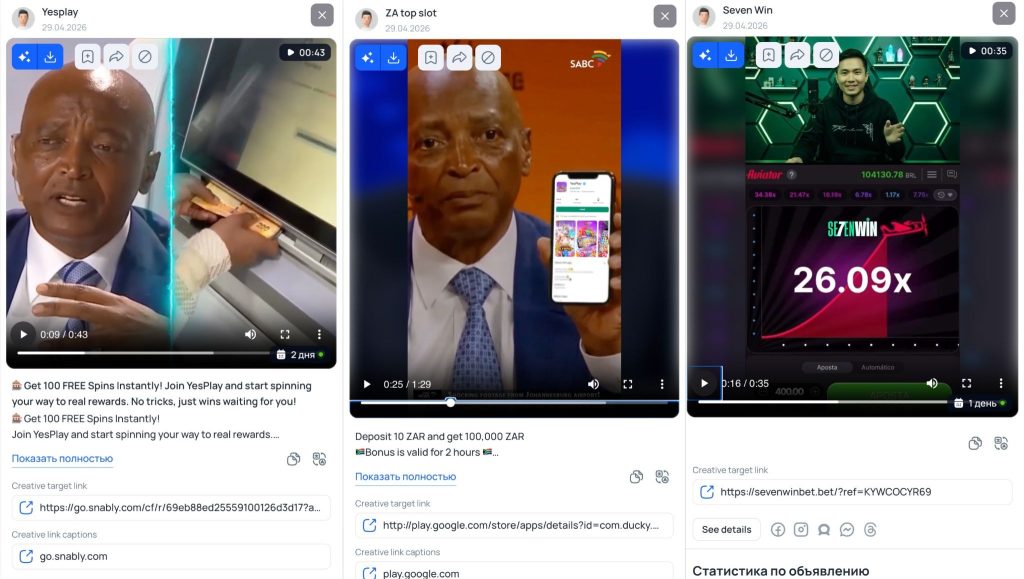
With this setup, the cost of generating a video with Wan 2.1 is minimal. The model’s flexibility also allows complex movements and objects to be rendered for specific tasks within a funnel.
Technical Limitations: Source Material and Video Quality
The quality of the result depends directly on the source material. Placing a European face onto footage of an Indian person, or using low-resolution photos, can produce a blurry face mask that looks out of place in the shot.
Choosing source footage and understanding the replacement area. The algorithm does not replace the entire head. It replaces a face mask extending from the eyebrows to the chin and from ear to ear. The ears, hair, skull shape, and neck remain those of the person in the source video, so the two people should have similar features.
When preparing the material, consider ethnicity, skin tone, and build. A mismatch between the skin tone of the face mask and the neck creates obvious edges that are difficult to remove in editing. Placing a wide face over a narrow chin also causes visible distortion and artifacts where the images meet.
Head angles and artifacts. Models that transfer facial movements, such as LivePortrait, are sensitive to head position. Footage in which the person looks directly at the camera works best.
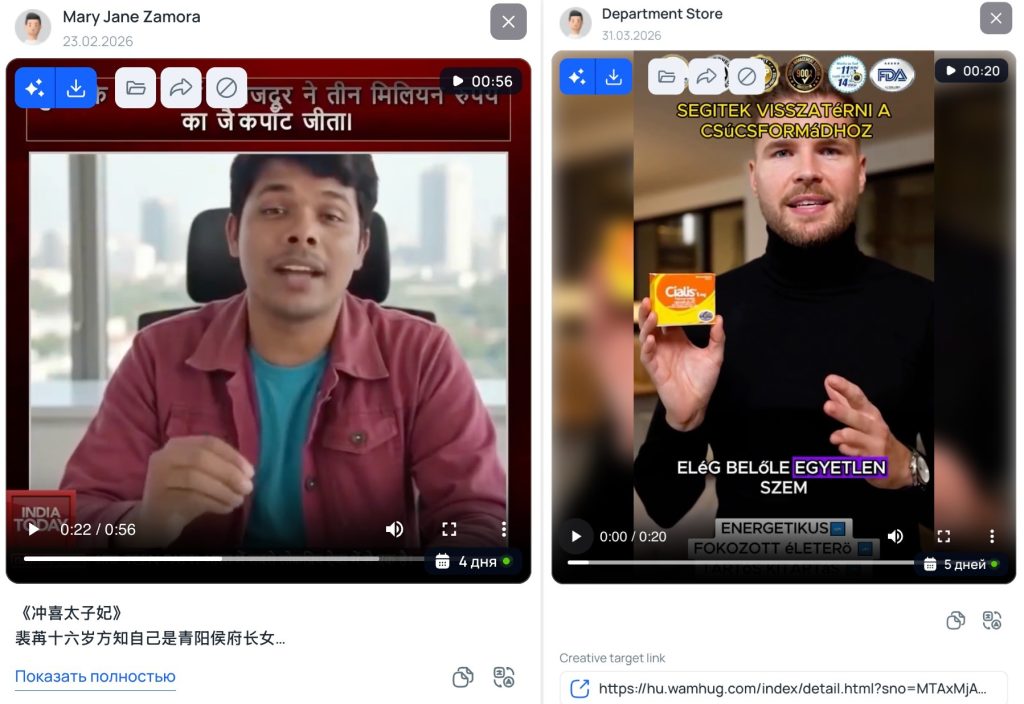
If the person turns sideways in the source footage, the algorithm may fail to recognize their facial features because it cannot reconstruct the hidden areas. The deepfake can then warp or jitter. Gestures cause similar problems: a hand passing in front of the face can obscure the mask and distort the image.
Post-production editing. AI-processed video often looks too smooth, giving away how it was made. To make the creative look natural, editors add a little grain to resemble ordinary phone footage and adjust the color so the face mask matches the neck and background. Slightly blurring the edges of the overlaid face helps it blend with the head in the source footage and reduces the pasted-on effect.
Production Costs: Replacing Outsourced Design with AI
Generating creatives with AI is more than a trend: it can substantially reduce costs and dependence on contractors. In scheme-based campaigns, where new faces and approaches need constant testing, AI can pay for itself after the first few launches.
Lower production costs. Actors and designers are expensive. A simple video testimonial ordered through a freelance marketplace or a specialist chat group costs $20–50. If a campaign needs 5–10 different faces, preparing the material alone can cost $300–500.
Using LivePortrait with Replicate, or running local software, reduces these costs to cents. Generating a single deepfake costs an average of $0.01–$0.1. For the price of one conventional commission, you can produce hundreds of different videos and scale without increasing production spending.
Faster production during waves of account bans. Waiting is the main drawback of outsourcing. An actor or designer might deliver a finished video within a few hours at best, but the next day is more common.
An AI model can return a finished result in 1–2 minutes. That matters during waves of Facebook account bans, when accounts are suspended one after another. Quickly rebuilding a creative with a new face lets you keep campaigns running and maintain your pace. You control production instead of waiting for your designer to become available.
Reducing creative fatigue. Audiences in scheme-based campaigns quickly become familiar with the same characters, causing CTR to fall. If you work with real actors, your existing roster eventually loses its impact.
AI lets you create dozens of different characters for each batch of accounts. You can generate a face in Midjourney, adapt it to the target market—for example, an Arab expert for UAE campaigns or a Latin American character for Brazil—and animate the photo in a couple of minutes. This makes it possible to test new approaches every day without depending on a supply of fresh source footage.
Step-by-Step Guide to Generating Video with Wan 2.1
For this walkthrough, we will use Wan 2.1 to create realistic video creatives. Because it needs more computing power than a typical laptop provides, we will run the process on a remote server.
Step 1. Rent a Server on RunPod
RunPod lets you rent a powerful computer with a professional GPU, avoiding the need to spend several thousand dollars on hardware.
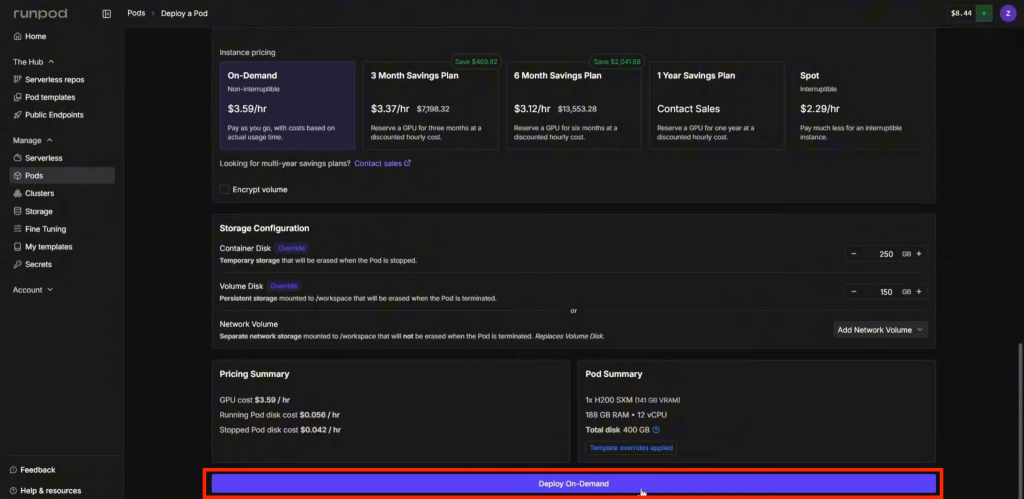
Create an account on the site and deploy a new container. Wan 2.1 requires plenty of VRAM, so choose a GPU such as the RTX 5090 or H200.
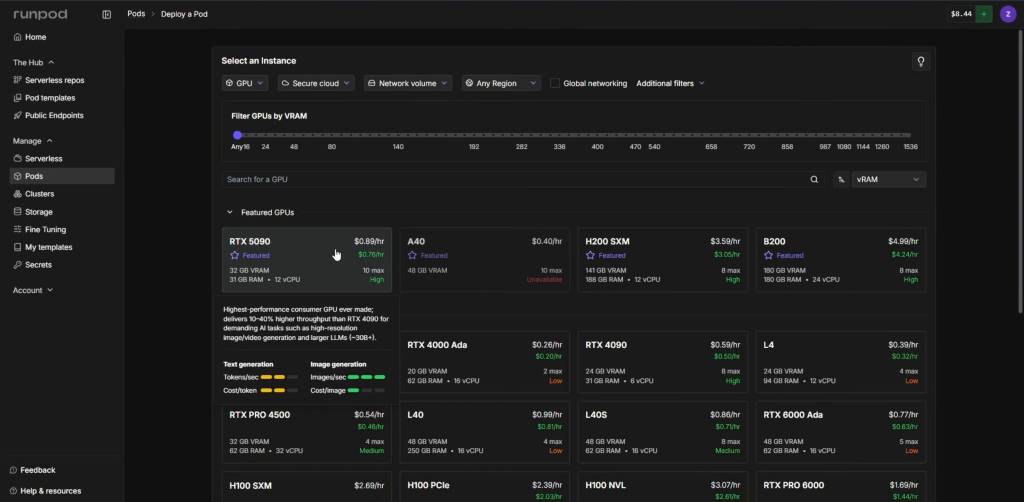
Set Volume Disk to 150 GB. This provides enough space for all the models without paying for unnecessary storage. Click “Deploy” and wait for the status to change to “Running.”
Step 2. Download the Model Weights through JupyterLab
Once the server is running, download the model weights: the files containing the information the model uses to represent objects and their movements. The software cannot run without them.
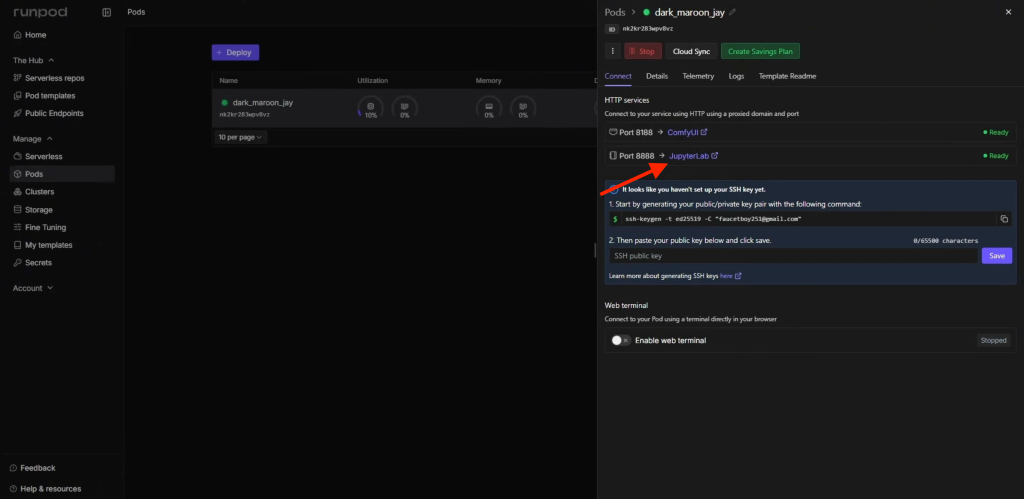
Connect to the server through “Connect” → “Jupyter Lab.” This opens your browser-based workspace.
Find the Models folder in the left-hand panel. If it is empty, the server is still unpacking its files; give it a couple of minutes.
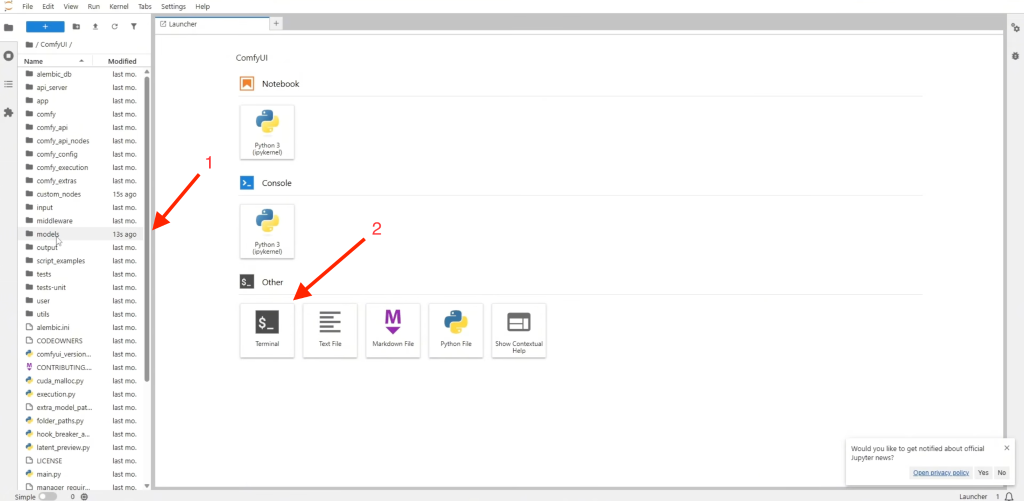
Open a terminal and download the weights using the direct links below:
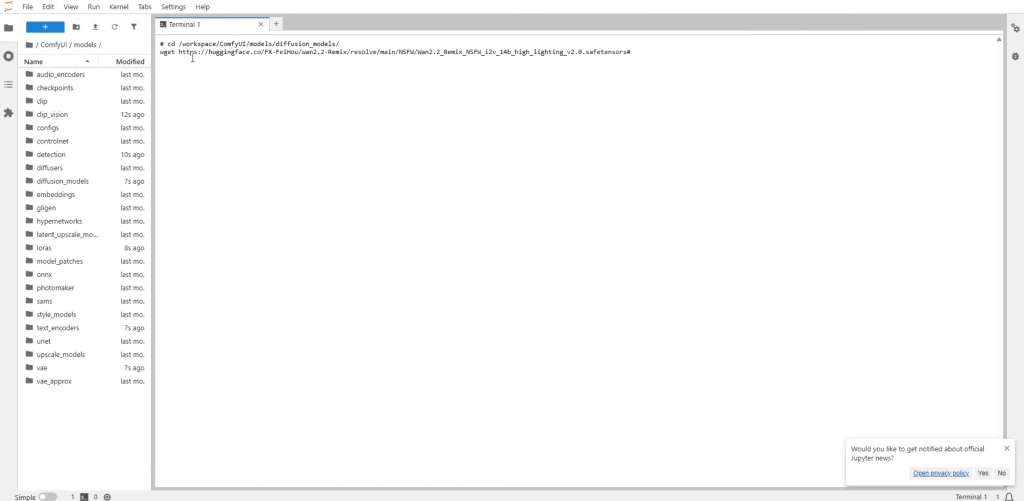
| 1) cd /workspace/ComfyUI/models/diffusion_models/ wget https://huggingface.co/FX-FeiHou/wan2.2-Remix/resolve/main/NSFW/Wan2.2_Remix_NSFW_i2v_14b_high_lighting_v2.0.safetensors 2) cd /workspace/ComfyUI/models/diffusion_models/ wget https://huggingface.co/FX-FeiHou/wan2.2-Remix/resolve/main/NSFW/Wan2.2_Remix_NSFW_i2v_14b_low_lighting_v2.0.safetensors 3) cd /workspace/ComfyUI/models/text_encoders/ wget https://huggingface.co/NSFW-API/NSFW-Wan-UMT5-XXL/resolve/main/nsfw_wan_umt5-xxl_fp8_scaled.safetensors 4) cd /workspace/ComfyUI/models/vae/ wget https://huggingface.co/QuantStack/Wan2.2-I2V-A14B-GGUF/resolve/c3641726f909b3446b7eefe994bcf8779c842a06/VAE/Wan2.1_VAE.safetensors |
To save time, run the commands in 2–3 terminal tabs at once. The downloaded files should appear in models/diffusion_models.
Step 3. Launch ComfyUI and Import the Workflow
ComfyUI is a graphical interface for working with AI models. Instead of writing code, you connect visual blocks, called nodes. Dragging a line from one node’s output to another’s input passes data between them, building the generation workflow from loading the model weights to rendering the final video.
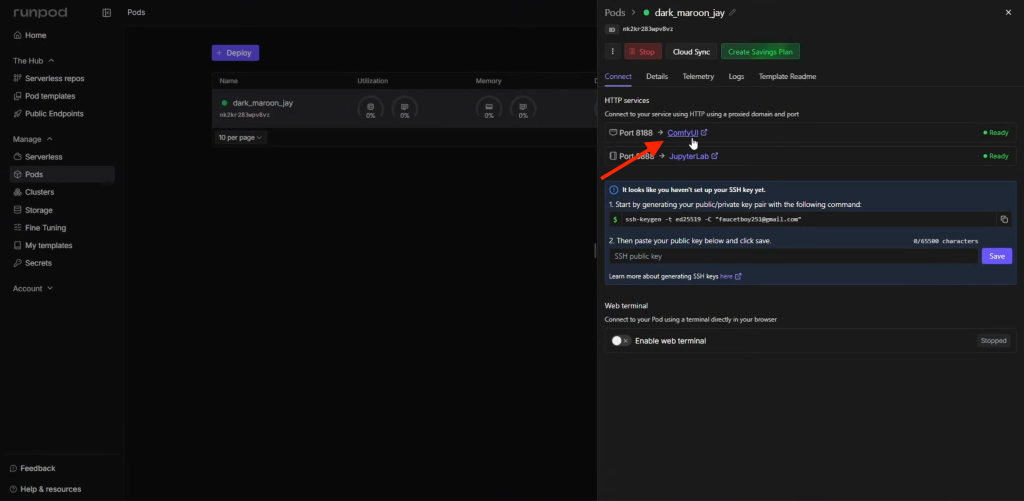
In RunPod, click “Connect” → “HTTP Service Port 8188.” A blank workspace will open. To avoid building the workflow manually, use a ready-made JSON workflow. This configuration file already defines the generation process. Drag it into the browser window.
Red nodes mean that the workflow requires custom nodes, or plugins, that are not installed.
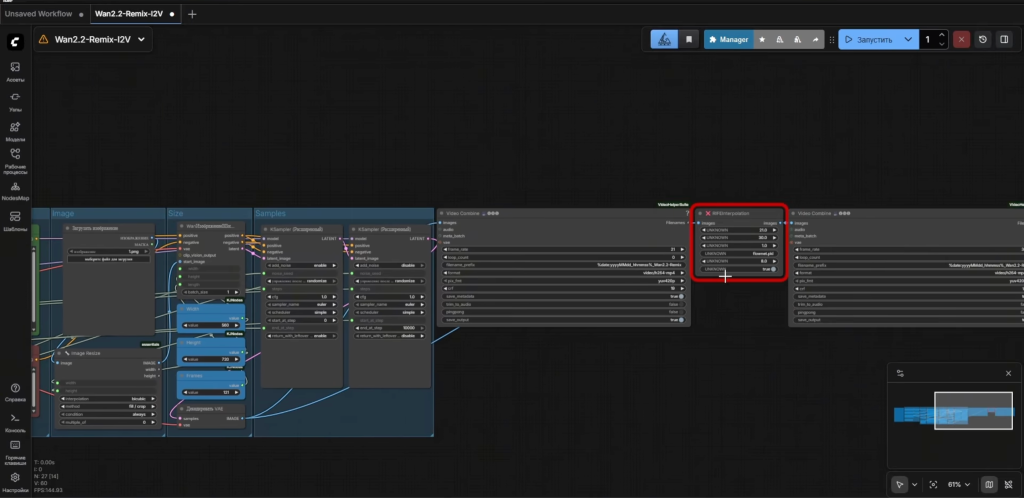
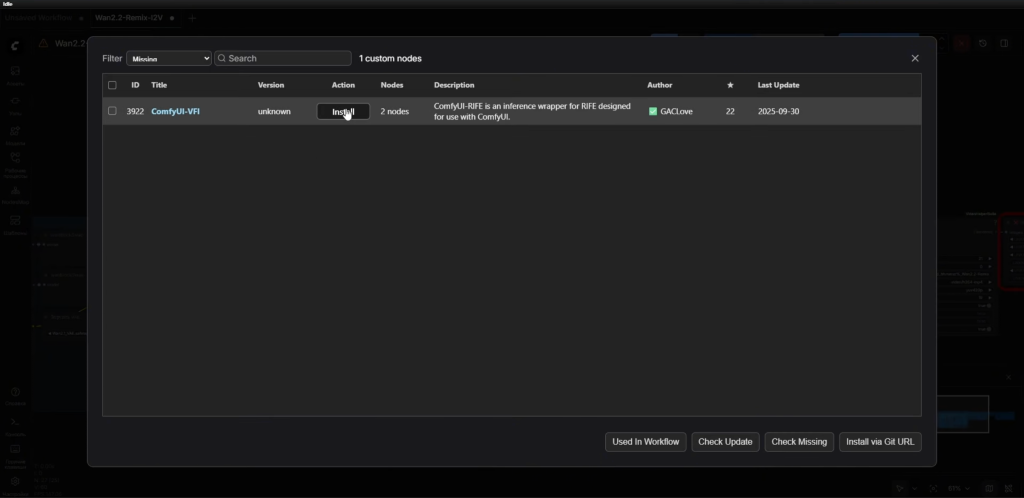
Go to Manager → Install Missing Custom Nodes, install everything listed—including the frame interpolator for smoother motion—and reload the page.
Step 4. Configure the Models
After importing the workflow, assign the downloaded weights to the corresponding nodes. Find the three model-selection nodes on the left side of the interface.
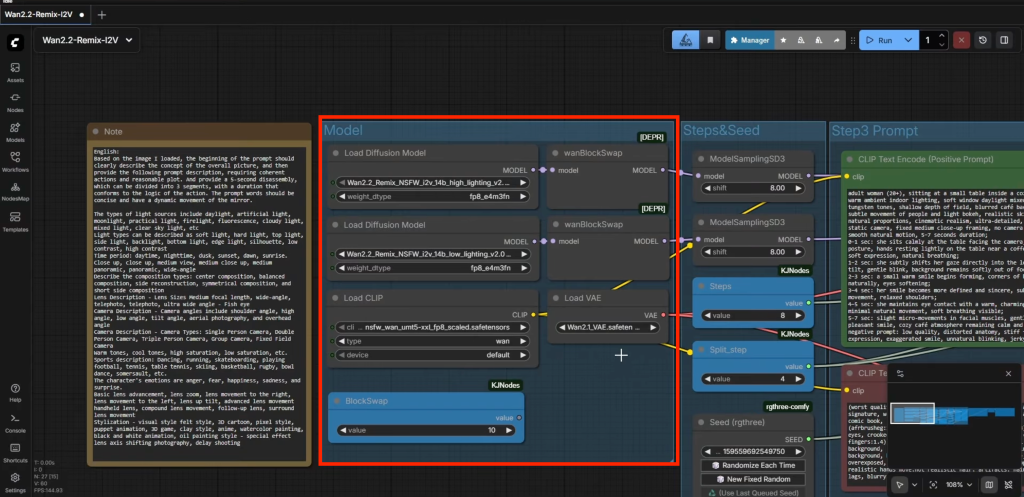
Select High Lighting in the first field and Low Lighting in the second. In the third node, Encoder, select NSFW Encoder Wan 2.1. This prevents the system’s filters from blocking generation and allows you to work without restrictions.
Step 5. Upload the Source Image and Set the Parameters
Find the “Load Image” node in the workflow and upload your character’s photo.
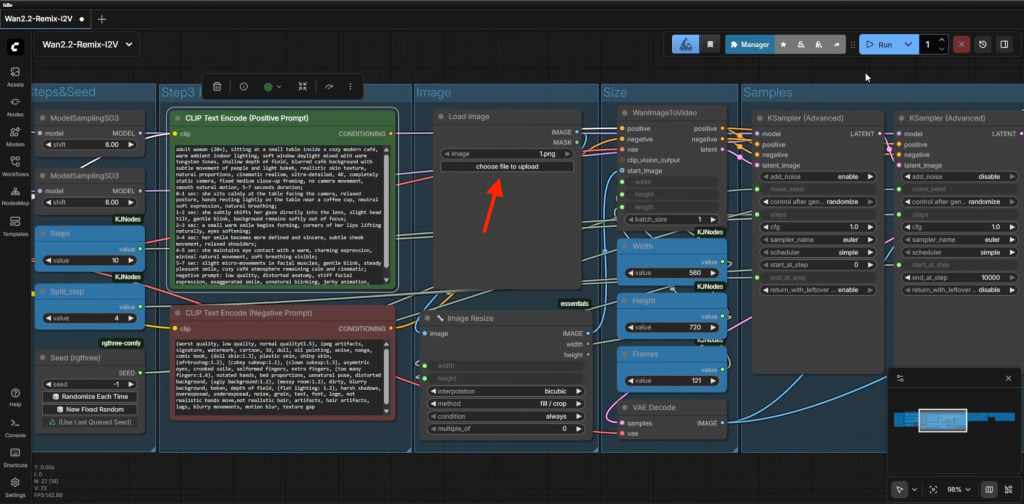
Use a front-facing image with no distracting details. Images generated with Midjourney or Flux work best because they are sharper.
Check the settings in the adjacent nodes:
- Resolution: use 720 by 1280 for vertical creatives;
- Frame count: for a video lasting 30–40 seconds, set 630 to 840 frames. Generating clips this long requires a large amount of VRAM, so a GPU such as the H200 or RTX 5090 is essential. If your hardware cannot handle it, generate 10-second clips and join them in an editor;
- Models: check that the weight-selection nodes contain the current files, and select the NSFW Encoder so that content filters do not block generation.
Step 6. Write the Prompt and Generate the Video
In the Positive Prompt field, describe what the character should do. Be specific about the movements: “man smiling, holding a phone, counting dollar bills”. For several actions within one clip, break the prompt into timed sections: “0-2s: talking, 3-6s: pointing at screen”.u need several actions in one video, break them down by time: “0-2s: talking, 3-6s: pointing at screen”.
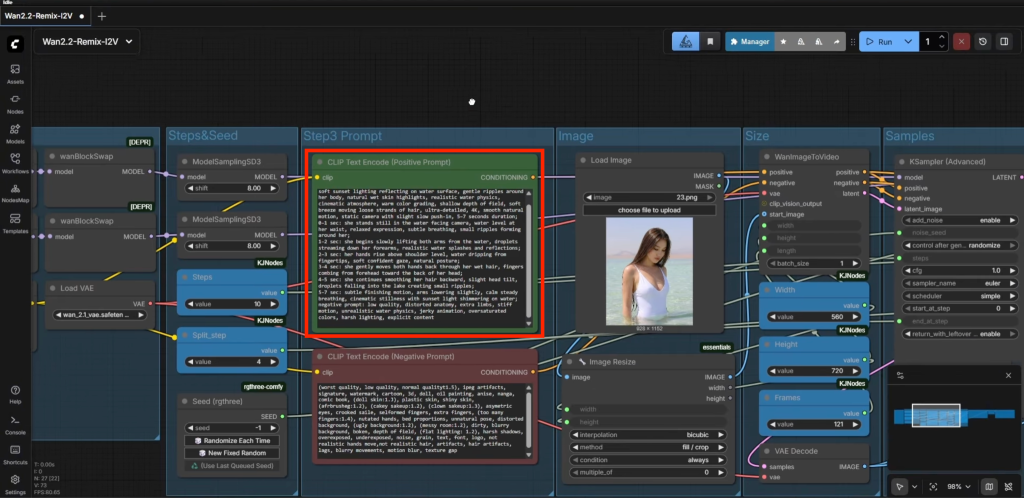
For a 30-second video for a scheme-based campaign, the prompt could look like this:
| “0-5s: A man looking at the camera, smiling and talking. 5-15s: He holds up a smartphone in his left hand, pointing at the screen with his right hand, showing a betting app with a growing balance. 15-25s: He takes out a stack of cash and starts counting dollar bills with a confident expression. 25-30s: He points his finger at the bottom of the screen with a call to action, smiling wide, high quality, realistic skin texture.” |
Click Queue Prompt. The first render takes longer because the GPU needs to load the large model-weight files.
Two files will appear in the preview. For your campaign, use the version processed by the frame interpolator at 30 FPS: it looks like smooth video footage rather than animation. If the face mask warps, change the Seed value and generate the video again.
Conclusion
Above all, AI tools offer a way to cut production costs substantially. You no longer need to commission a designer every time: Wan 2.1 with RunPod lets you produce unique creatives for iGaming and crypto campaigns at very low cost.
The budget previously spent on source material and repeated revisions can go directly into buying traffic instead, which makes more sense while testing for a campaign setup that works.

Comments (0)