

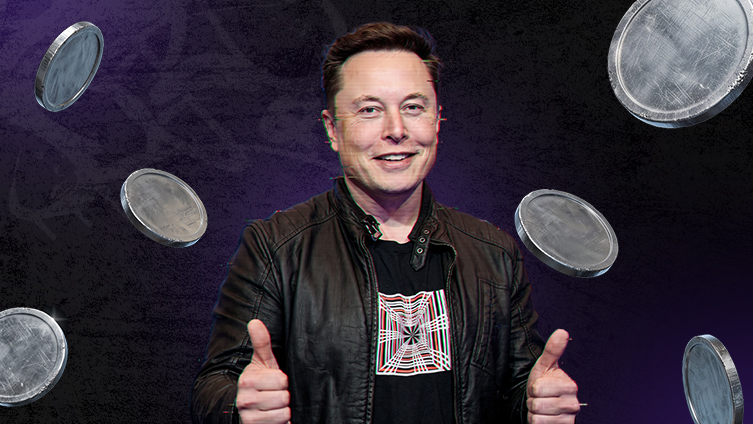
In scheme traffic, videos with a “face” are used to keep users in the funnel and push them toward making a deposit. Working with live actors or outsourcing designers is expensive and slows down campaign launches, especially when you need a lot of source material for different approaches. Neural networks let you handle creatives yourself: a media buyer can generate characters for any task without relying on contractors.
Using AI tools reduces the cost of a single video to just a few cents and speeds up campaign launches. In this article, we break down methods for creating deepfakes on your own hardware and in the cloud, compare tool prices, and provide a step-by-step guide to animating static photos.
Generation Methods: Cloud vs Local Hardware
The choice of technical solution depends on the scale of your campaigns and your starting budget. In affiliate marketing, there are two main approaches: building your own “farm” for heavy software or using cloud computing power.
Local Software (Faceswap, DeepFaceLab)
This option is suitable for teams working with large volumes and planning to generate hundreds of source files per week. The main requirement is an NVIDIA graphics card with CUDA support. For stable operation in 2026, you’ll need a setup like an RTX 3080 or RTX 4090 with at least 12 GB of video memory.
The main advantage of this method is complete independence. You use open-source code that doesn’t care about the subject of your videos. You can voice any scripts about hacking algorithms or gaming strategies without worrying about bans.
After purchasing the hardware, the cost per video drops to zero, but the entry threshold for such production starts at $1500–3000 per computer. You’ll also need to be ready to work with the console and set up Python libraries.
Cloud Services (HeyGen, Synthesia)
Platforms with ready-made avatars are great for creating warm-up videos and quickly assembling UGC content. As of 2026, the Creator plan on HeyGen costs $29 per month. The package includes 200 credits, which with the premium Avatar IV model equals 10 minutes of finished video. The cost per minute within the limit is $2.9, but when scaling, the price for each additional minute rises to $5. Restrictions can be bypassed by creating custom photo avatars based on your own source images. While official rules prohibit using public figures’ faces without consent, technical workarounds allow you to bypass these filters during testing.

Services may block accounts for aggressive scripts, but if you use neutral wording in your text, the cloud remains a viable tool for campaign launches. The main downside is the high per-minute cost when scaling campaigns.
GPU Rental via RunPod
Purchasing your own hardware for heavy neural networks requires an investment of $2,000–3,000, which is often impractical at the testing stage. RunPod allows you to rent RTX 4090 or H200-level power and pay only for the actual GPU usage time. This eliminates the need to buy components and lets you launch rendering directly from your browser.
The main advantage of this method is the complete absence of censorship. Unlike “white” cloud services, the RunPod + ComfyUI combo lets you use NSFW encoders. This means you can freely include stacks of cash, casino logos, or app interfaces in your prompts without restrictions.
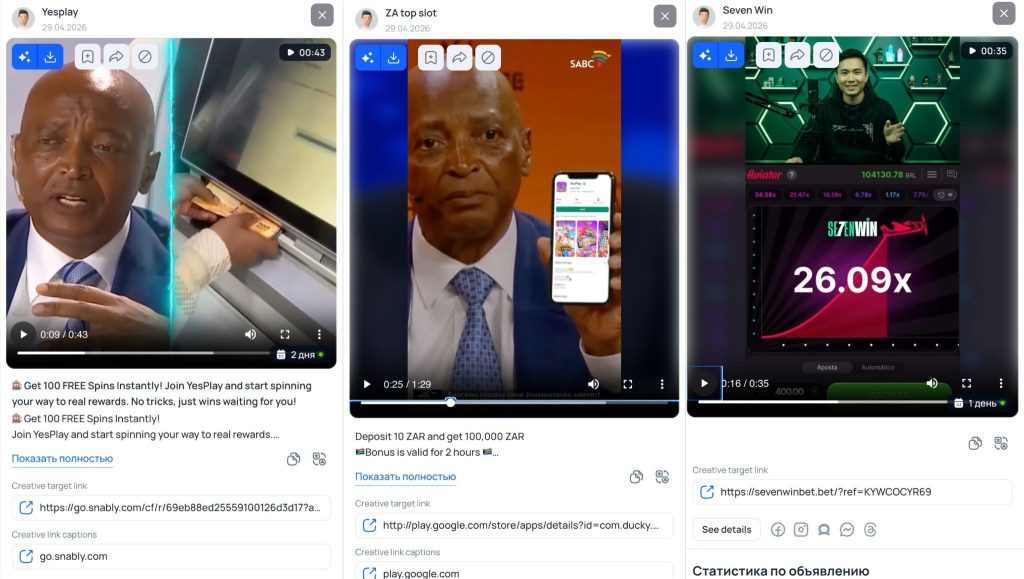
The cost per video on Wan 2.1 with this approach is minimal, and the model’s flexibility allows you to render complex movements and objects tailored to specific funnel tasks.
Technical limitations: pre-production and quality
The generation result directly depends on the quality of the source material. If you overlay a European face on a video with an Indian person or use low-resolution photos, the mask will be blurry and stand out from the overall frame.
Selecting donors and replacement zones. The algorithm does not replace the entire head. The replacement area is limited to the “face mask” from eyebrows to chin and from ear to ear. Ears, hair, skull shape, and neck remain from the video donor. For this reason, the characters should have similar features.
When preparing materials, it’s important to consider race, skin tone, and build. A difference in skin tone between the mask and the neck creates sharp borders that are hard to remove in post-production. You also can’t combine a wide face with a donor’s narrow chin without visual distortions and artifacts at the seams.
Head angles and artifacts. Neural networks based on facial motion transfer (such as LivePortrait) are sensitive to head position. It’s best to use videos where the character looks straight into the camera.
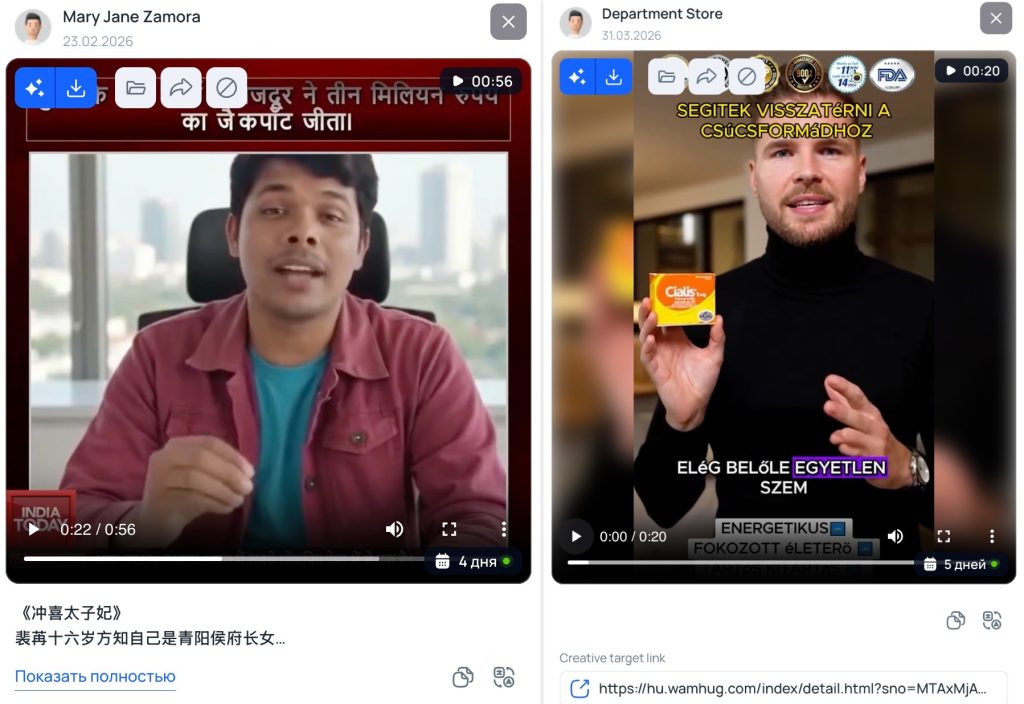
If the person in the source video turns to the side, the algorithm often fails to recognize facial features since it can’t reconstruct hidden areas. In these moments, the deepfake starts to “drift” or jitter. A similar issue occurs with gestures: if a hand passes in front of the face, the mask is blocked by fingers and the image gets distorted.
Post-processing in editors. Videos after neural network processing often look too smooth, revealing their origin. To make the creative look natural, editors add a slight grain to mimic footage from a regular phone and perform color correction, matching the mask’s tones to the neck and background. Slight blurring along the edges of the overlaid face helps it fit better on the donor’s head and eliminates the “pasted-on” effect.
Process economics: replacing designers with AI
Switching to creative generation via neural networks is not just about following trends—it’s a way to radically cut costs and remove dependency on contractors. In scheme traffic, where you constantly need to test new faces and approaches, AI pays off after just a few launches.
Direct cost reduction. Actors and designers are expensive: a simple video testimonial on a freelance platform or in niche chats costs from $20 to $50. If you need 5–10 different faces for a proper campaign, your material prep budget alone will rise to $300–500.
Using the LivePortrait + Replicate combo or local software cuts these costs to almost nothing. Generating a single deepfake costs on average $0.01–$0.1. Essentially, for the price of one standard order, you get hundreds of unique videos, allowing you to scale without inflating your production expenses.
Speed and storm mode workflow. The main downside of outsourcing is the wait time. A designer or actor delivers a finished video in the best case in a few hours, but more often only the next day.
The neural network delivers a ready result in 1–2 minutes. This is critical during Facebook storms, when accounts are getting banned one after another. The ability to instantly rebuild a creative with a new face lets you keep uploading and maintain your pace. You no longer wait for your designer to be available—you control the process yourself.
Solving burnout issues. Audiences in schemes quickly get used to seeing the same characters, which leads to a drop in CTR. If you use real actors, their pool simply burns out.
AI lets you create dozens of unique characters for each batch of accounts. You can generate a face in Midjourney, adapt it to a specific GEO (for example, make an Arab expert for UAE campaigns or a Latino for Brazil), and animate the photo in a couple of minutes. This allows you to test new approaches daily and not depend on whether you have fresh video sources at hand.
Step-by-step guide for generation on Wan 2.1
To create realistic creatives, we’ll use the Wan 2.1 model. Since it requires more power than a regular laptop can provide, we’ll run the whole process on a remote server.
Step 1. Renting a server on RunPod
RunPod is a service where you can rent a powerful computer with a professional graphics card. This saves you from having to buy hardware for several thousand dollars.
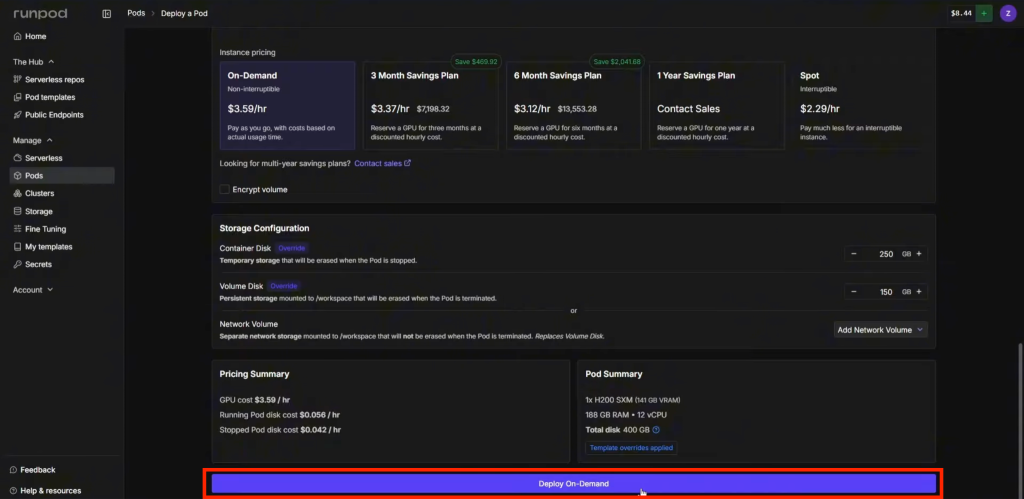
To get started, register on the site and launch a new container. The Wan 2.1 model requires a large amount of video memory, so choose a card like the RTX 5090 or H200.
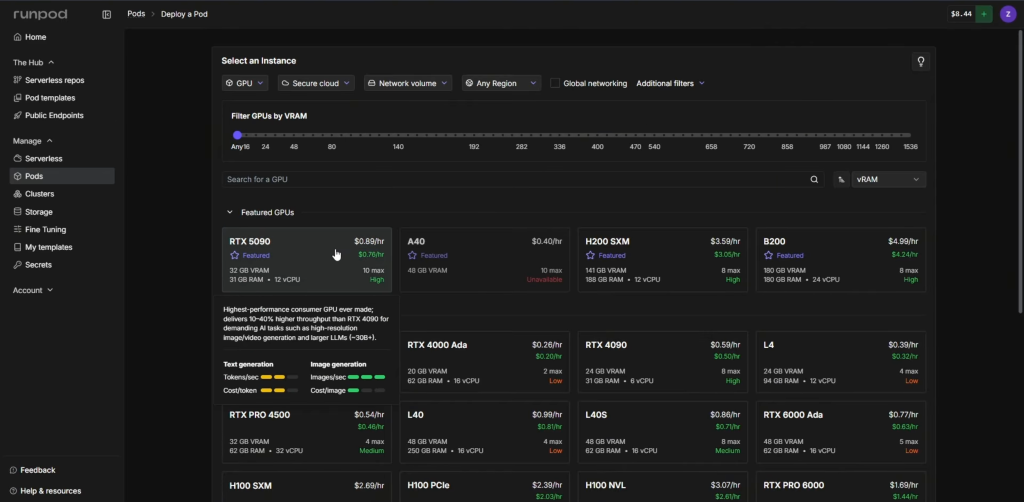
In the disk settings (Volume Disk), set 150 GB—this is enough for all models, and you won’t overpay for extra space. Click “Deploy” and wait for the status to change to “Running.”
Step 2. Uploading weights via Jupyter Lab
After launching the server, you need to download the neural network’s “brains” onto it. These are the files that contain information about how objects and their movements should look. Without them, the program won’t start.
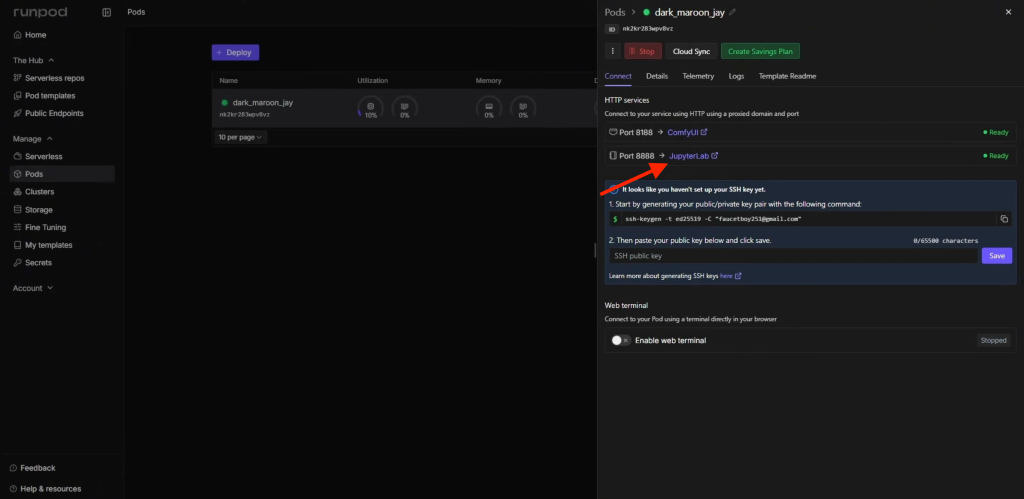
To do this, connect to the server via “Connect” -> “Jupyter Lab” (this is your workspace in the browser).
In the left menu, find the Models folder. If it’s empty, the server is still unpacking—wait a couple of minutes.
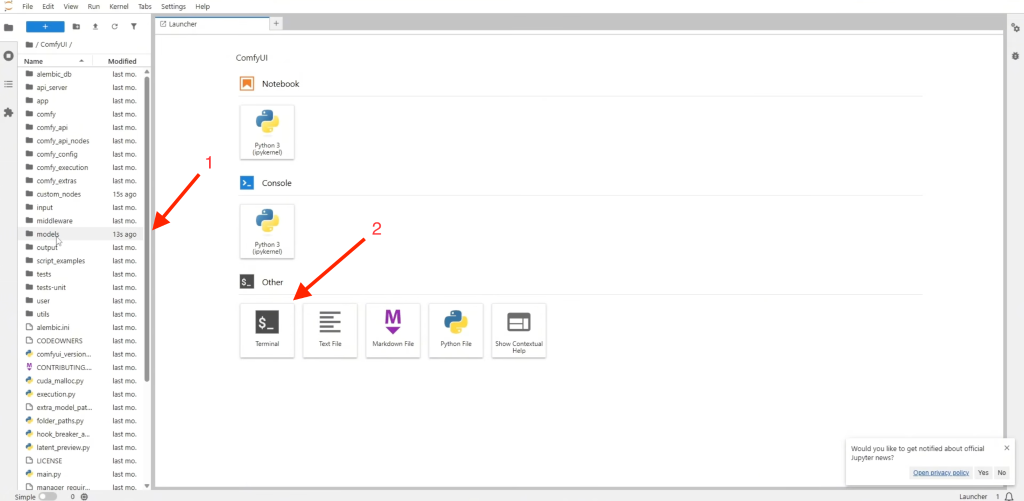
Open the terminal and start downloading the weights via direct links:
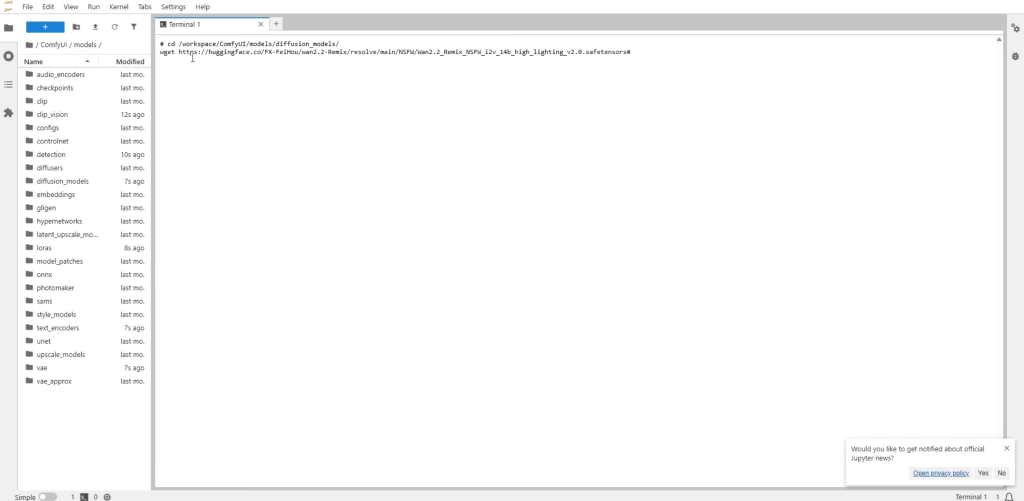
| 1) cd /workspace/ComfyUI/models/diffusion_models/ wget https://huggingface.co/FX-FeiHou/wan2.2-Remix/resolve/main/NSFW/Wan2.2_Remix_NSFW_i2v_14b_high_lighting_v2.0.safetensors 2) cd /workspace/ComfyUI/models/diffusion_models/ wget https://huggingface.co/FX-FeiHou/wan2.2-Remix/resolve/main/NSFW/Wan2.2_Remix_NSFW_i2v_14b_low_lighting_v2.0.safetensors 3) cd /workspace/ComfyUI/models/text_encoders/ wget https://huggingface.co/NSFW-API/NSFW-Wan-UMT5-XXL/resolve/main/nsfw_wan_umt5-xxl_fp8_scaled.safetensors 4) cd /workspace/ComfyUI/models/vae/ wget https://huggingface.co/QuantStack/Wan2.2-I2V-A14B-GGUF/resolve/c3641726f909b3446b7eefe994bcf8779c842a06/VAE/Wan2.1_VAE.safetensors |
To save time, open the commands in 2–3 different terminal tabs at once. The final files should appear in the models/diffusion_models folder.
Step 3. Launching ComfyUI and Importing the Workflow
ComfyUI is a graphical interface for managing neural networks. Instead of writing code, you work here with visual blocks (nodes) connected by improvised wires. You simply drag lines from the output of one node to the input of another, passing data and building the generation logic: from loading model weights to the final video render.
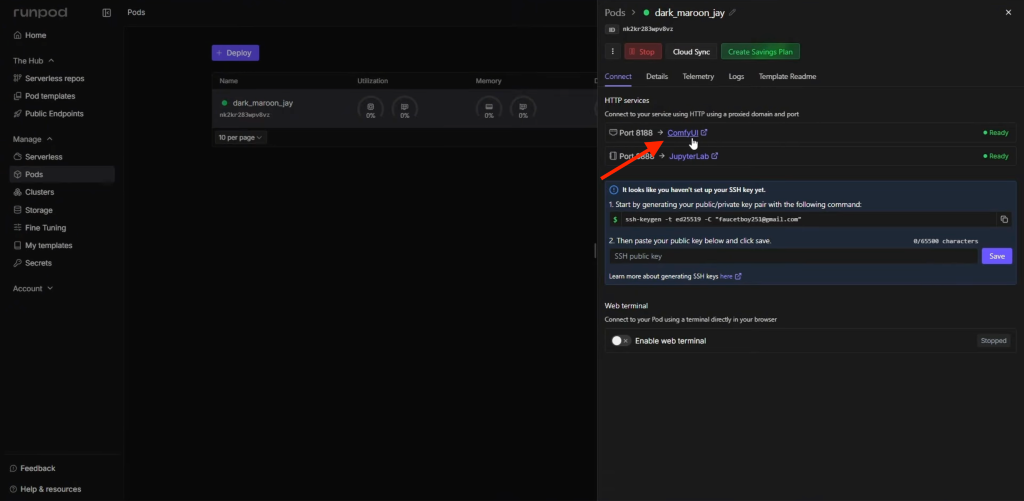
In RunPod, click “Connect” -> “HTTP Service Port 8188”. A blank field will open. To avoid building the scheme manually, use a ready-made JSON workflow. This is a configuration file where all the generation logic is already set up. Just drag and drop it into the browser window.
If the blocks are highlighted in red, it means the program is missing custom nodes (plugins).
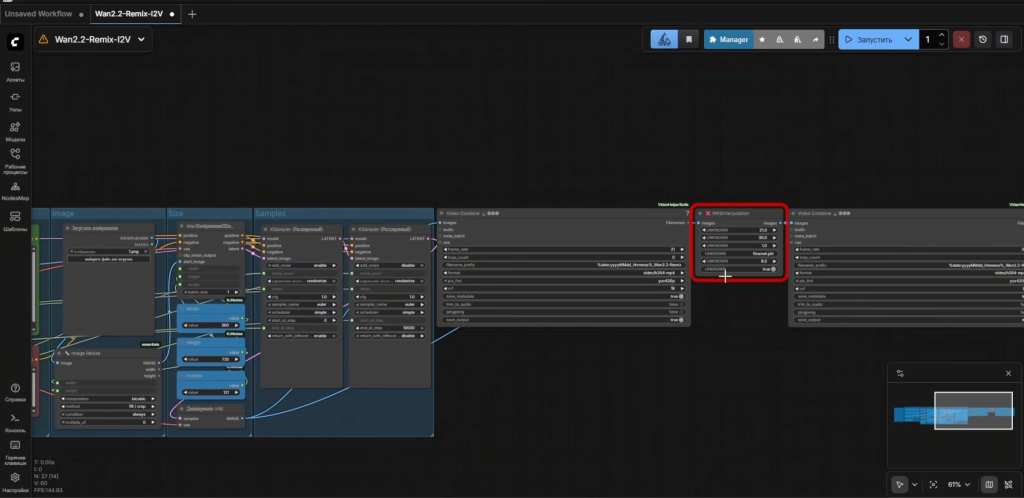
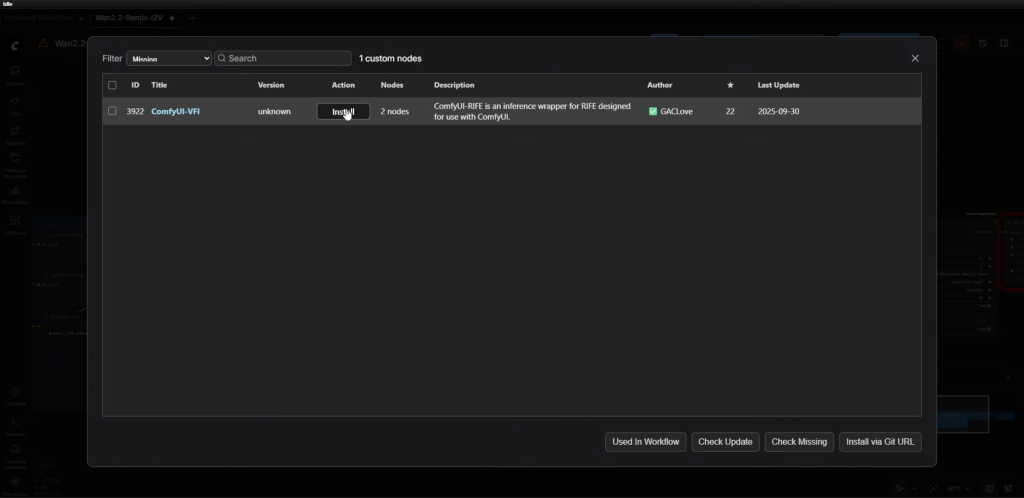
Click Manager -> Install Missing Custom Nodes, install everything (including the frame interpolator for smoothness), and reload the page.
Step 4. Technical Setup of Models
After loading the workflow, you need to link the downloaded weights to specific blocks. On the left side of the interface, find the three model selection nodes.
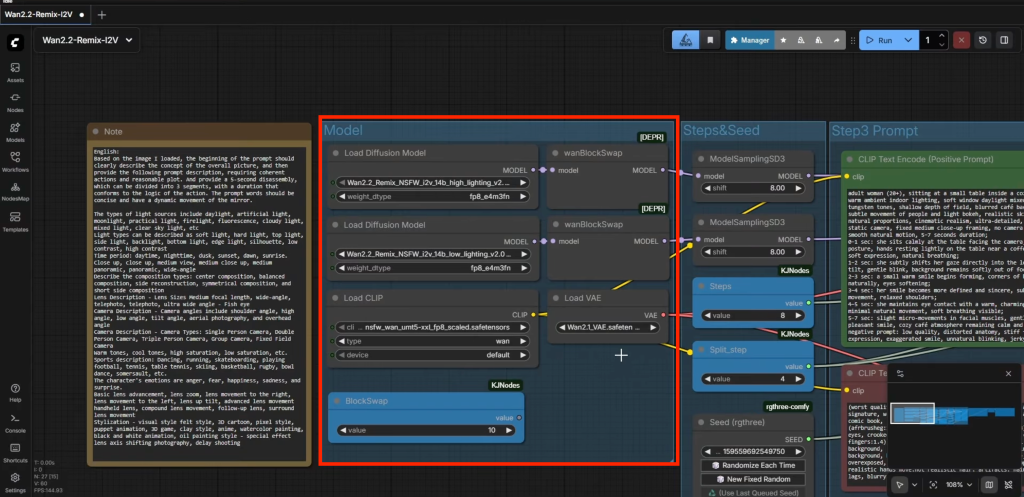
In the first field, select High Lighting; in the second, Low Lighting. In the third block (Encoder), choose NSFW Encoder Wan 2.1. This is necessary so the system doesn’t block generation due to filters and you can work without restrictions.
Step 5. Uploading Source Files and Technical Parameters
In the workflow, find the “Load Image” block and upload a photo of your character.
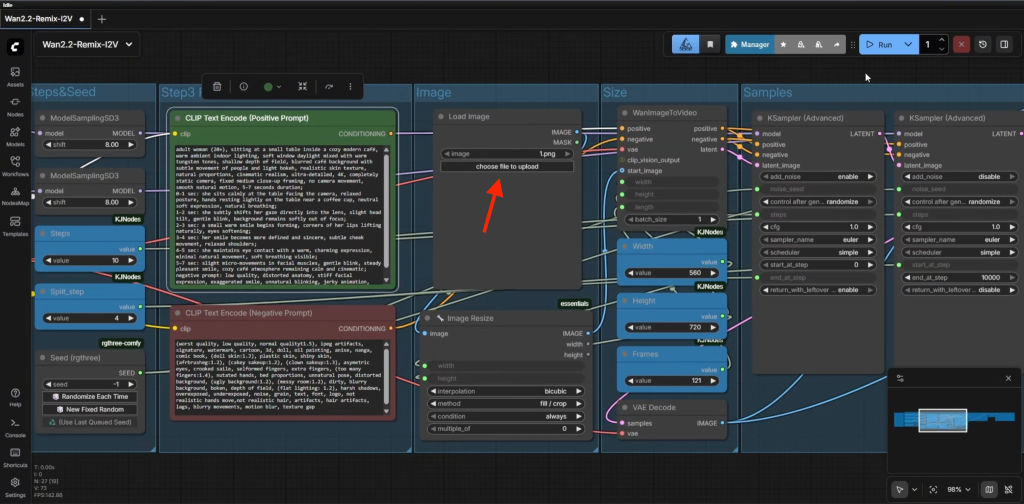
The face should be frontal and without extra details. It’s best to use generations from Midjourney or Flux, as they have higher clarity.
In the neighboring blocks, check the parameters:
- Resolution: for vertical creatives, set it to 720 by 1280;
- Frame count: to make the video last 30–40 seconds, set the value from 630 to 840. Keep in mind that generating this length requires a huge amount of video memory, so H200 or RTX 5090 level cards are a must. If your hardware can’t handle it, it’s better to generate the video in 10-second parts and stitch them together in an editor;
- Models: in the weight selection nodes, check for the presence of up-to-date files and always select the NSFW Encoder to prevent the system from blocking generation due to censorship.
Step 6. Prompting and Getting the Result
In the Positive Prompt field, write exactly what the character should do. Describe movements as specifically as possible: “man smiling, holding a phone, counting dollar bills”. If you need several actions in one video, break them down by time: “0-2s: talking, 3-6s: pointing at screen”.
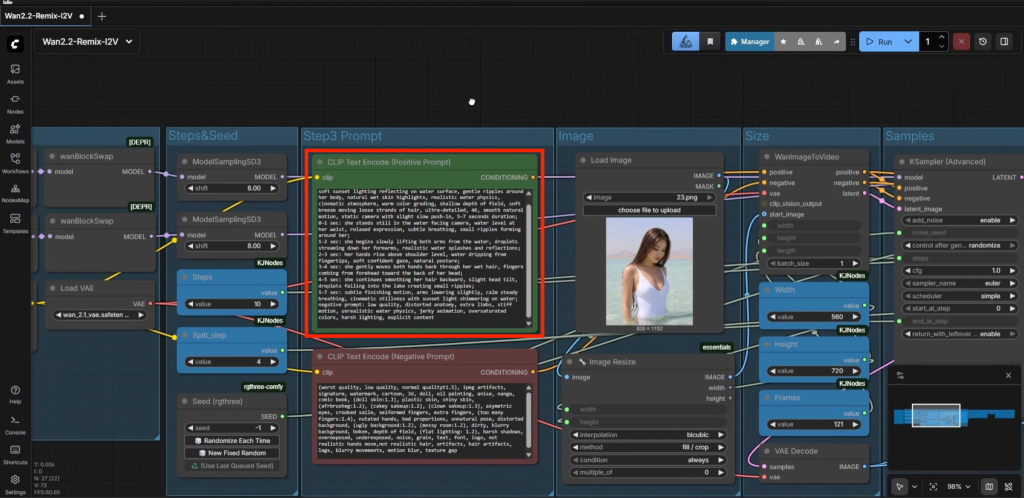
For a schematic 30-second video, the prompt might look like this:
| “0-5s: A man looking at the camera, smiling and talking. 5-15s: He holds up a smartphone in his left hand, pointing at the screen with his right hand, showing a betting app with a growing balance. 15-25s: He takes out a stack of cash and starts counting dollar bills with a confident expression. 25-30s: He points his finger at the bottom of the screen with a call to action, smiling wide, high quality, realistic skin texture.” |
Click Queue Prompt. The first render always takes a long time because the graphics card is loading heavy weight files.
Two files will appear in the preview window. For uploading, always use the version processed by the interpolator (30 FPS) — it looks like smooth video footage, not animation. If the face mask “drifts,” just change the Seed value and run the generation again.
Conclusion
Using neural networks is above all an opportunity to seriously cut production costs. Now there’s no need to contact a designer every time: the Wan 2.1 + RunPod bundle lets you create unique creatives for iGaming and Crypto for next to nothing.
The entire budget that used to go to paying for source materials and endless revisions can now go directly to traffic acquisition, which makes much more sense at the stage of finding a working bundle.

Comments (0)