


When first encountering Facebook* Ads Manager, it can be difficult for a beginner to navigate the dashboard: there are dozens of tabs, targeting parameters, and optimization tools. It’s easy to get lost in the settings and waste your budget before the campaign even starts delivering results.
To get conversions, it’s not enough to simply upload a creative and set up targeting. Ad performance directly depends on technical preparation: creating a business portfolio, linking cards, and correctly passing events.
In this article, we break down in detail how Facebook* Ads Manager works in 2026: from preparing your account and setting up the pixel to campaign structure, budget management, and analytics.
What is Ads Manager and how is it different from Business Manager
Many beginner buyers confuse Ads Manager and Business Manager, even though these two tools serve different purposes.
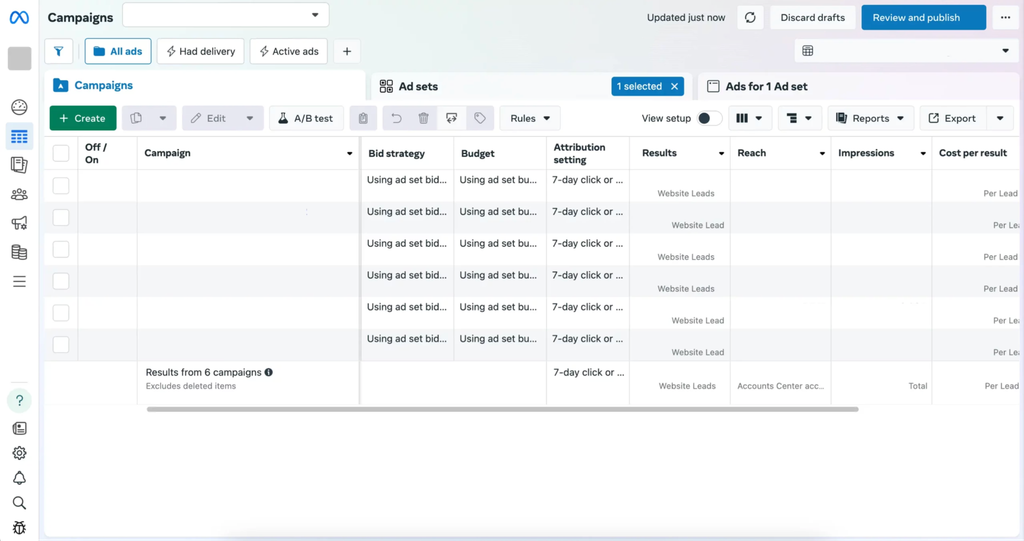
Ads Manager is the workspace where you build the ad campaign itself: choose the objective, set up targeting, define the budget, upload creatives, and track click and conversion metrics.
Business Manager is a unified control panel. In the current Meta* interface, this section has been renamed to Business Portfolio, but buyers still commonly use the abbreviation BM.
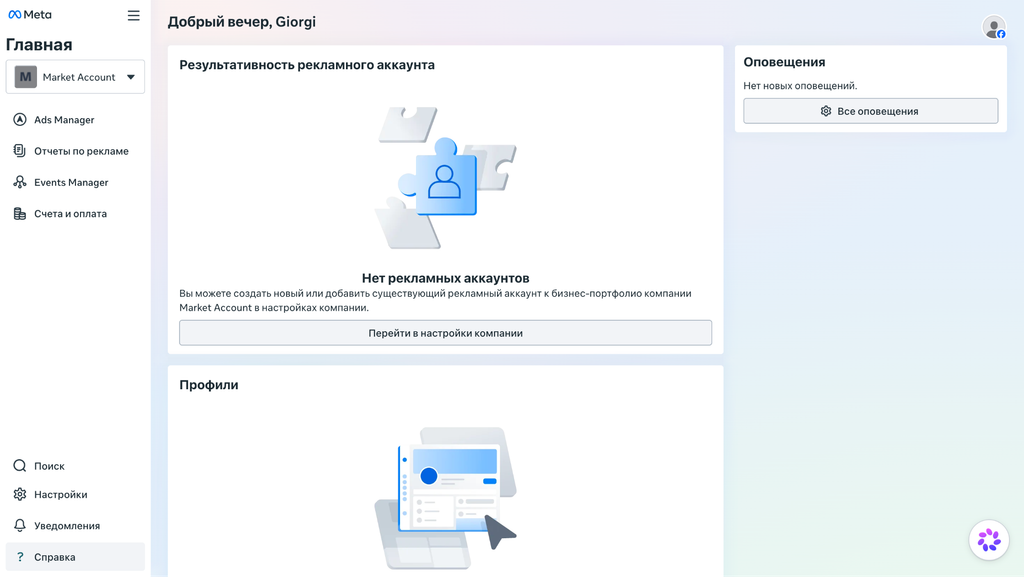
This is where you combine ad accounts, Facebook* pages (Fan Page), Instagram* profiles, pixels, domains, and payment methods.
Why you shouldn’t run ads from a personal account
Every Facebook* profile by default has one personal ad account. When you first go to business.Facebook*.com, the platform usually redirects you straight to this personal account. It’s not recommended to launch ads from here for several reasons.
- First, the functionality of the personal account is limited: you can’t create multiple pixels for different sites, verify a domain, or connect a product catalog.
- Second, the personal account is tied to only one owner. You can’t transfer rights to another buyer or add a team with different access levels.
- Third, it’s a security issue. If your personal Facebook* profile gets checkpointed or blocked for policy violations, access to the ad account, linked cards, and collected pixel data will be lost with no way to recover it.
Advantages of working through Business Manager
Running ads through BM gives you the following benefits:
- Separation of ad accounts. Within one BM, you can create several separate accounts for different sites or offers. If one account gets banned, the others will keep running ads.
- Access and role control. The BM owner can invite members by email and assign specific permissions. For example, an analyst can be given view-only access to stats without the ability to change the budget, while a buyer can be allowed to edit ads in a specific account.
- Centralized data management. All pixels and verified domains are linked directly to the BM. This allows you to share a single pixel across multiple ad accounts. If a specific account gets banned, the pixel with its optimization history and the domain are not lost—they can be immediately linked to a new backup account.
Getting Started: Fan Page, Roles, and Linking Payment Methods
Before launching ads, you need to set up the technical foundation: secure your Business Manager, link a payment method, and set up the page that will be used for ad delivery.
BM Security
Immediately after creating or purchasing a BM, go to “Business Settings.” To reduce the risk of checks and avoid losing access to your accounts, set up the basic security parameters:
Filling in company information. In affiliate marketing, BMs are bought from supply stores, so no one enters real company documents or details here. However, you can’t leave the fields empty: Meta* pays attention to profile completeness, and an empty profile lowers trust in the account.
The data is taken from Google Maps based on the GEO of the profile: find any real business like a cafe or car service, copy the exact address with postal code, local phone number, and website.
Two-factor authentication. In the settings, enable 2FA with the requirement “For all members.” This protects the account from hacking and reduces the risk of hitting a checkpoint.
A checkpoint is a security check from Meta*. When antifraud detects suspicious activity (for example, logging in from a new IP address or a different browser), it temporarily blocks the page and requires identity verification: entering a code from SMS, confirming login via an email link, or sending a photo of documents.
If you can’t confirm the data, you’ll lose access to the account. Enabling two-factor authentication confirms login security, so profiles are less likely to be sent for such checks.
Adding a second administrator. By default, only one profile is linked to the BM—the account creator. If this account hits a checkpoint or gets a restriction on advertising activity, access to all ad accounts, pages, and pixels will be lost.
To retain control, always add a backup profile to the BM: in the “People” tab, click “Invite people,” enter the email of the second account, and grant full admin rights.
Linking Cards
Before linking a card, you need to create the ad account itself. To do this, go to the “Ad Accounts” tab in BM settings, click “Add,” and select “Create a new ad account.”
Set a clear name, choose the time zone for your target GEO, and the billing currency. After that, open the billing section of the created account to add a payment method.
Meta* uses a post-payment system: ads run first, and funds are debited when the billing threshold is reached or at the end of the month.
For payments, use virtual debit or credit cards. When adding a payment method to the account, keep three things in mind:
- Verification hold. When linking a card, Meta* temporarily blocks one or two dollars on the balance to check 3D-Secure functionality. If there are no funds on the card or the bank declines the transaction, the account immediately gets Risk Payment status and is banned. That’s why you should always keep a $5 to $10 reserve on a new card.
- Initial spend limits. On new accounts, Meta* almost always caps the daily budget at $25 or $50. Setting a higher budget is pointless: ads will stop exactly at the limit. The limit increases automatically as regular payments go through.
- Billing threshold. The first charge by Meta* is for a small amount: after spending the first $2, $5, or $10. If payments go through smoothly, the credit threshold gradually increases to $25, $50, $125, $250, and higher.
Creating, Filling, and Warming Up a Fan Page
Fan Page is a public page for a company, brand, or author within Facebook*. All ads in the Facebook*, Instagram*, and partner placements feeds are run exclusively on behalf of a fan page.
In the ad, users see the name and avatar of this page. People can click on it, go to the profile, view posts, read reviews, or send a direct message.
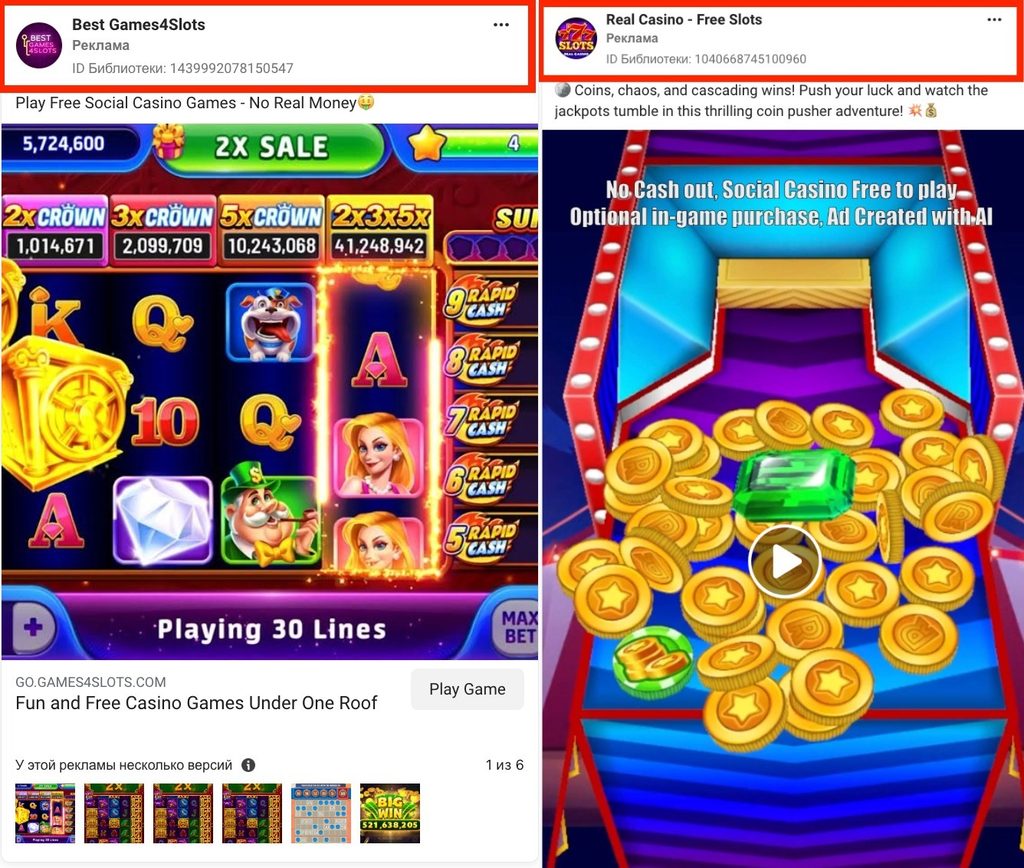
Preparing a fan page is a crucial part of the process, as auction algorithms evaluate not only the creative but also the trust level of the page itself. If you launch ads from an empty fan page without posts or design, moderation may reject the ad or block the ad account at the slightest suspicion.
Preparing a fan page for work is divided into several stages:
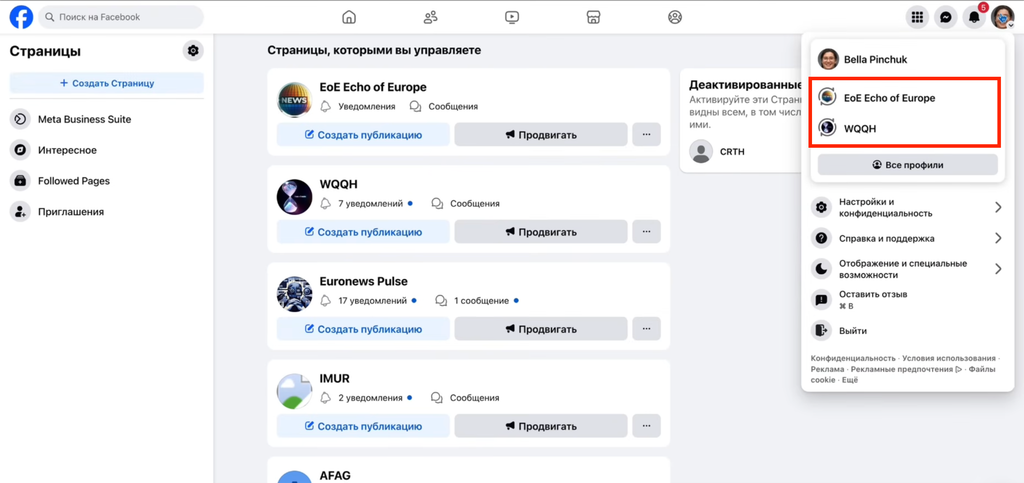
Switching to page profile. You can create a new fan page in the main Facebook* menu under the “Pages” tab. But if you just access it from your personal profile, Facebook* won’t let you edit most of the information.
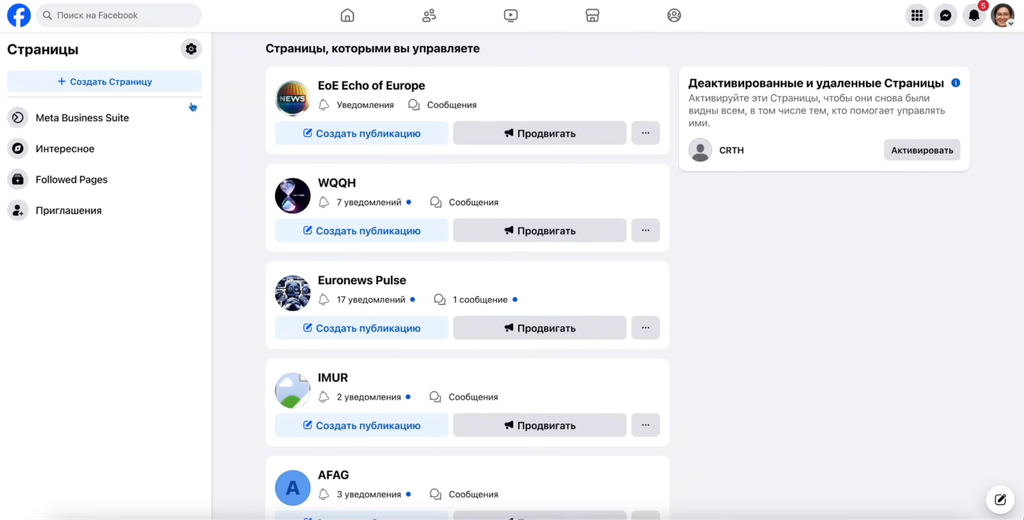
To fully configure the page, click your account avatar in the top right corner and manually switch to the created fan page. Only after this will the interface give you access to all fields and posts.
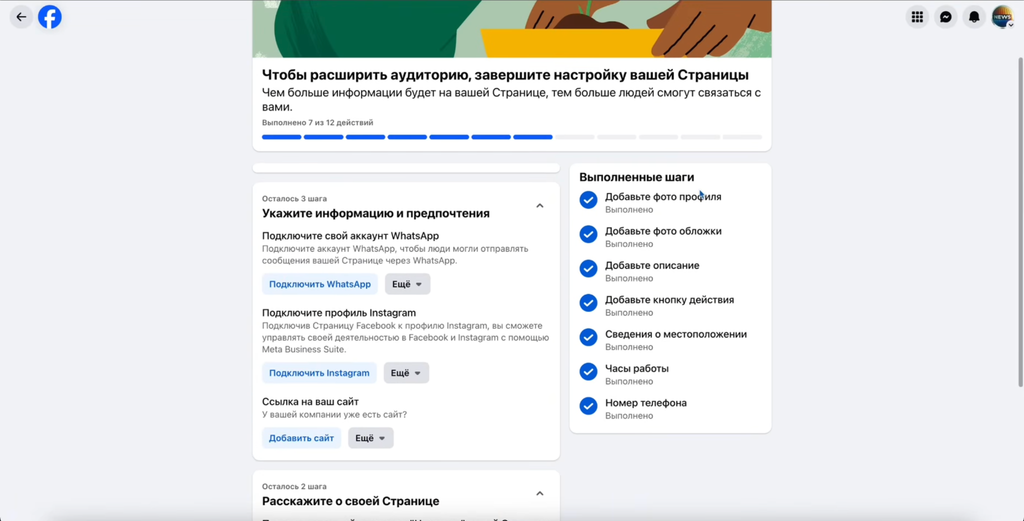
Basic design and action button. Upload an avatar, cover photo, and set up the action button, which is located in the header under the banner. The usual actions are “Send Message” or “Shop Now”: this increases the profile completeness score for moderation, and users can immediately start a conversation.
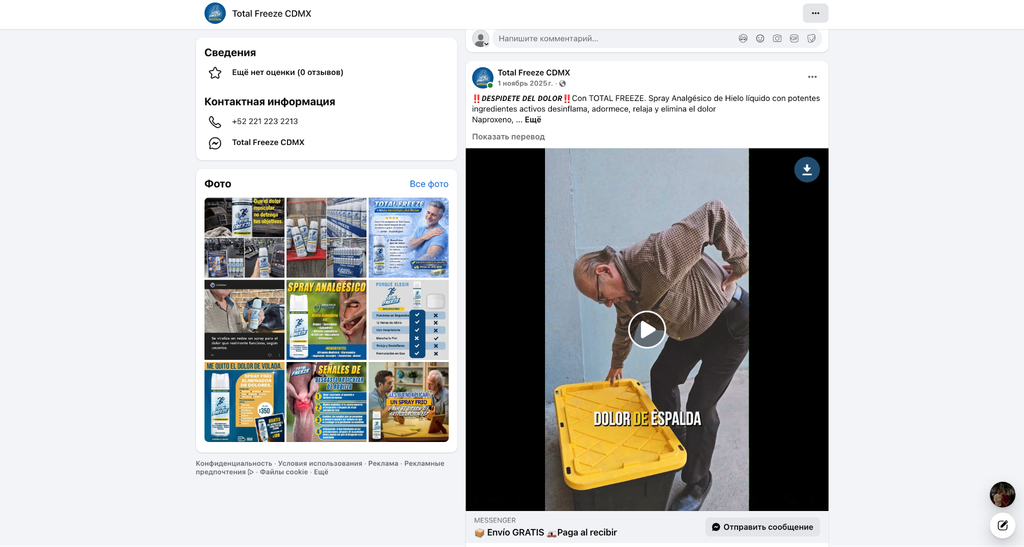
After that, you need to post 5–7 neutral posts related to your offer’s topic. For example, if you plan to promote joint supplements or weight loss products, post short informative articles about a healthy lifestyle, exercise, or proper nutrition.
Linking Instagram*. If you plan to run ads in the Instagram feed, Stories, and Reels, connect your Instagram* account to the fan page.
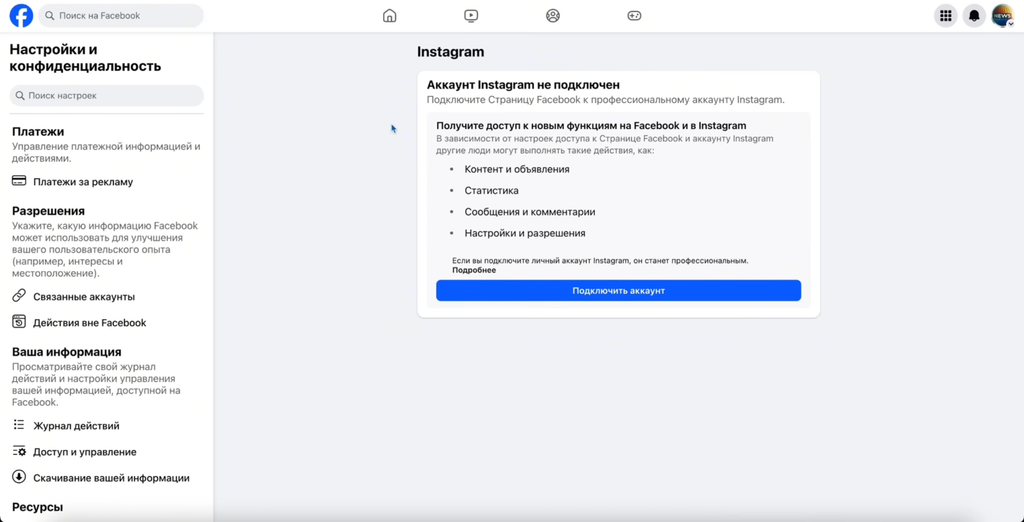
This will allow you to moderate comments under your ads: negative feedback can lower your funnel’s conversion, so you need to regularly monitor, clean up, or hide comments under your ads.
Warming up a fan page. You can’t launch lead or sales campaigns from a fresh page. If Meta* algorithms see that a new fan page with no history immediately starts sending traffic to a landing, the account can quickly get hit with an ARD (ad activity restriction). To build trust, the page needs to be warmed up first.
To do this, pick one of the published posts and boost it with a minimal budget of $1–$2 per day targeting the GEO you plan to run traffic to later.
Run the ad for 2–3 days: during this time, the post will get its first likes and impressions, and the page gains basic trust. After that, you can move on to setting up campaigns for your main offer.
Setting up Meta* Pixel and Conversions API
Meta* Pixel is a code snippet that a webmaster installs on their landing or pre-landing page. The main purpose of the pixel is to track visitor actions on the page and send reports about these events back to the ad account.
When a user clicks on an ad, they land on the target website. If the pixel isn’t installed, Meta* registers the click but doesn’t know what happened next—whether the person closed the tab after a second or filled out a form and submitted a lead.
All ad optimization is built on data about target actions. Meta* analyzes the profiles of people who reached a lead or purchase, finds common behavioral patterns, and starts buying impressions for similar audiences within the selected GEO.
If the pixel isn’t on the site or events are set up incorrectly, the campaign will spend budget without optimization, since the algorithm can’t see who’s bringing results and distributes impressions chaotically, which can drive up the cost per lead several times over.
Previously, a standard pixel on the site was enough to track target actions. Now, due to ad blockers and privacy restrictions in Safari and iOS, the pixel script misses a significant share of conversions.
That’s why data collection uses a combined approach: a standard pixel in the page code plus the server-side Conversions API (CAPI) protocol, which transmits information about actions directly from the server or tracker.
Pixel Creation
In the current Meta* interface, pixel creation has been moved to the “Datasets” tab.
To create a pixel, go to “Business Settings,” open the “Data Sources” -> “Datasets” tab, click “Add,” and enter a name.
After creating it, you need to immediately link an ad account to the dataset. In the dataset card, click “Connected Assets,” select your ad account, and save the changes.
If you skip this step, the pixel simply won’t appear in the dropdown list when setting up a campaign in Ads Manager.
Domain Verification
You need to verify the landing domain inside BM, otherwise Meta* will limit optimization options for events:
- In “Business Settings,” open the “Brand Safety” > “Domains” section.
- Click “Add” > “Create New Domain” and enter the website address without http/https protocol or slashes.
- Select DNS verification. Copy the TXT record line like Facebook*-domain-verification=….
- In your domain control panel on your hosting or Cloudflare, create a new TXT record: enter @ in the name field and paste the code from Meta* in the value field.
- Click “Verify Domain.” The record usually propagates within a couple of minutes.
Connecting Conversions API (CAPI)
The standard pixel works through the browser: when a user visits the site, the page loads the tracking script. If the person uses AdBlock, data collection is disabled in iOS, or Safari blocks third-party cookies, the browser blocks information from being sent. As a result, only 60–70% of events reach Meta*. When the algorithm misses conversion data, optimization suffers, which can increase ad costs.
Conversions API solves this problem by sending data directly via a “server-to-server” scheme. The transfer bypasses the browser: as soon as someone submits a form, the site sends the lead data to your server or Keitaro, from where the request goes straight to the Meta* server.
Ad blockers and browser restrictions only work on the user’s device and can’t interfere with direct server-to-server communication. Thanks to this, CAPI increases event delivery rates to 90–95%.
How to generate an access token:
- Open the main menu and go to Events Manager.
- Select your dataset and go to the “Settings” tab.
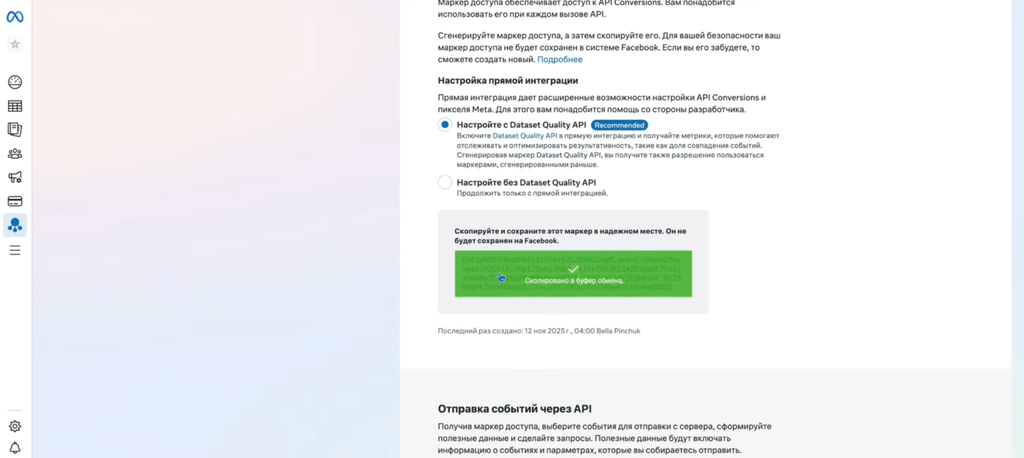
- Scroll down to the Conversions API section and under “Manual Setup,” click “Generate Access Token.”
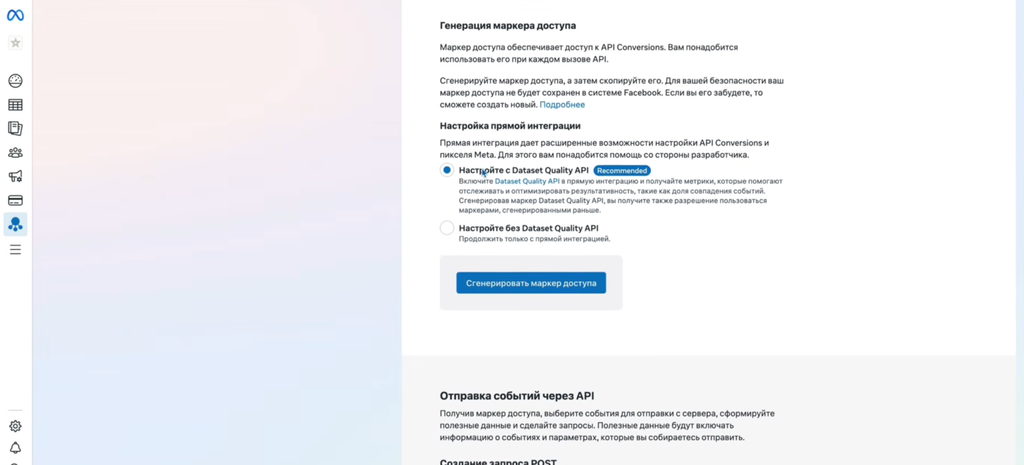
- Copy the generated key. This token, along with the pixel ID, is entered in the tracker settings, affiliate postbacks, or in the server handler code.
Event Deduplication
If both the standard pixel and Conversions API are running on the site at the same time, data about a single lead is sent twice: first from the user’s browser, then from your server. To avoid seeing two conversions instead of one real one in your ad account, you need to set up event deduplication.
Deduplication is the automatic removal of duplicates within Meta*. When two identical purchase or lead reports come into the account, the algorithm checks the parameters (click time, IP address, and event number) and merges them. As a result, only one valid lead appears in the reports, and the pixel receives the maximum amount of user information.
Checking functionality in the Test Events tab
After linking the token, be sure to check if the events are reaching the account:
- In the Events Manager menu, open the “Test Events” tab.
- Open your website in a new tab and submit a test lead through the order form.
- Return to Events Manager. A real-time row with the Lead event will appear in the table.
- Check the event status: it will show that the data has been successfully received and processed.
If the test lead appears in the list, data collection is set up correctly and you can proceed to creating ads.
Three-level structure: campaigns, ad sets, and creatives
In Ads Manager, ad setup is built on three levels: campaign, ad sets, and ads. Each level has its own tasks: the campaign sets the objective and budget allocation model, ad sets configure the audience and placements, and at the ad level, creatives are uploaded and the landing page link is specified.
Campaign level
At the first level, you define the promotion objective and set the budget management scheme. The choice of objective determines which users the algorithm will target in the auction.
To collect leads on landing pages, select “Leads” or “Sales”: the system focuses on pixel events and shows ads to those most likely to leave their contact details or place an order.
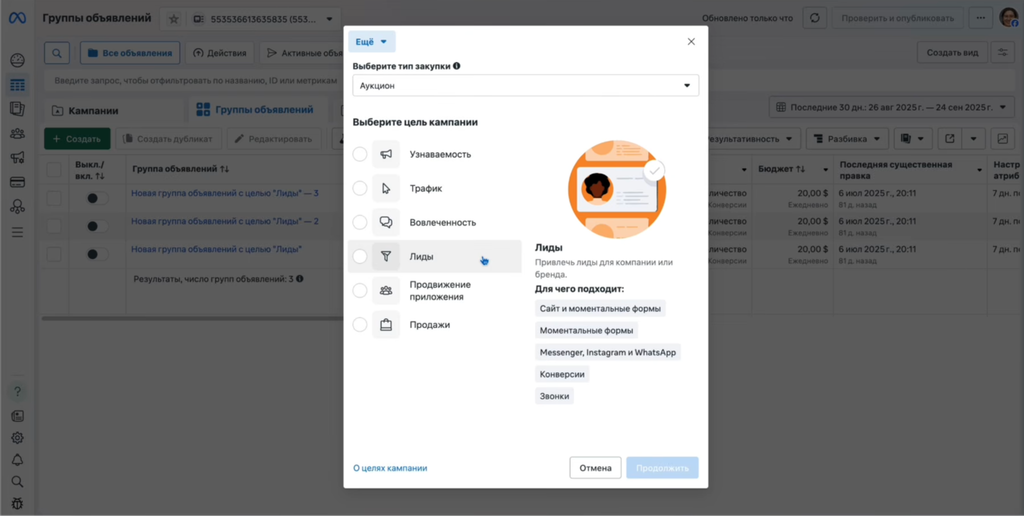
Choosing “Traffic” for such funnels makes no sense. With this objective, the algorithm targets people who are more likely to just click links, so the conversion to actual leads on the landing page is noticeably lower.
This is also where you set the budget:
- ABO (ad set budget). The spending limit is set separately in each ad set (for example, $10–15 per ad set). This is the standard option for testing: each ad set spends only its fixed budget, allowing you to evaluate bundles and audiences under equal conditions.
- CBO (Advantage Campaign Budget). The total daily budget is set for the entire campaign. The algorithm evaluates the cost per result in real time and redirects most of the money to the ad set that delivers cheaper leads. This format is usually used when scaling a working bundle.
Ad set level
At the ad set level, you define the audience, placements, and conversion tracking parameters.
If traffic goes to an external landing or pre-landing page, you need to select “Website” as the conversion type. Next, link the working pixel to the group and specify the target event—most often, this is Lead. Based on this action, the algorithm understands which event on the site to count as a successful result and starts searching for users with similar behavior.
In the audience settings, set the parameters according to the offer requirements: country, gender, and age. If the site is tailored for a specific language within a multilingual GEO (for example, Spanish when targeting the US), select that language in the language settings. This will exclude users who won’t understand the text on the page.
Ad Level
At the ad level, you configure what the user sees in their feed. To launch, select the prepared Facebook* page (Fan Page) from which the ad will run.
Next, upload the creative—video or static image—write the text, headline, choose a call-to-action button (for example, “Learn More” or “Shop Now”), and specify the landing page link.
Targeting Setup: Audiences and Placement Selection
After choosing the objective and budget, move to the ad set: set the target audience parameters and select the platforms where the ads will be shown.
Advantage+ Audience vs Manual Interests
In the audience block, Meta* may default to Advantage+ Audience mode or suggest switching to original settings with detailed targeting. Don’t switch to manual interest input: when you artificially narrow the audience, it becomes harder for the algorithm to optimize ad delivery for the desired actions on the site.
For external landing campaigns, launch to a broad audience. In the ad set settings, specify only the GEO, gender, and age according to the offer requirements, and leave detailed targeting empty.
In this mode, the creative itself drives audience targeting:
- Initial delivery. After passing moderation, the algorithm starts showing the ad within the selected GEO, age, and gender.
- Creative response. Non-target users simply scroll past. The target audience is hooked by the offer and pain point in the ad: they read the banner text, watch the video, click, and move further down the funnel to the pre-lander or landing page.
- Conversion tracking. When a user reaches the end of the funnel and submits a lead form, the pixel and Conversions API send a Lead event to the ad account.
- Bundle optimization. The Meta* algorithm analyzes the profiles of converted users: it finds similar behavioral patterns and starts deliberately buying impressions at auction for similar audiences.
If instead of targeting a broad audience you manually specify interests in the ad set—for example, for a joint offer, select “Arthritis” or “Healthy Lifestyle”—the ads are restricted to a narrow user segment.
When the available audience volume is heavily limited, CPM starts to rise. As a result, each click and final lead becomes more expensive, and the bundle burns out quickly because the ad keeps running to the same people.
Manual Placements and Platform Filtering
Turn off automatic placement mode and switch to manual selection. This is necessary to remove the Audience Network: traffic from third-party mobile apps and games generates a large volume of accidental clicks and almost never converts on landing pages.
When setting up manually, specify three main parameters:
- Devices. Most landing pages and pre-landers are designed for mobile traffic. On desktop, mobile layouts often break, which lowers the conversion rate. To avoid wasting budget on irrelevant clicks, you should disable desktop in the “Devices” line and leave only smartphones enabled.
- Formats for placements. For mobile feeds on Facebook* and Instagram*, use square creatives with a 1:1 ratio, and for Stories and Reels, use vertical videos with a 9:16 ratio. You can’t upload the same creative to all placements: a square image in Stories will have black bars at the top and bottom, and a vertical video in the Facebook* feed will get its sides cropped by the platform.
- Preview check. On some platforms, the interface overlays directly on the ad. For example, on Facebook* Marketplace, banners are covered with price tags, contact buttons, and a search bar—these can block your text and call to action. Before submitting your campaign for moderation, always check each placement in the preview window: if the layout is off or interface buttons cover the headline or main message, you should disable that placement by unchecking it.
Ad formats and creative technical requirements
After setting up placements, move on to preparing the ads themselves: choosing the format, uploading assets, filling in the texts, and checking how everything displays on smartphones.
Static, video, and carousel
At the ad level, Meta* offers three basic formats: single image or video, carousel, and collection.
For single offers, a standard image or video is usually chosen. Carousel is used in e-commerce and product offers: this format allows you to upload 2 to 10 cards with separate links to showcase a product line or a single product from different angles.
Technical requirements for image ads:
- File format: JPG or PNG. It’s better to save as JPG for a smaller file size.
- File size: The official limit is up to 30 MB. The optimal working size is 5–7 MB so the banner loads quickly even with slow mobile internet.
- Aspect ratio: 1:1 (square) for Facebook* and Instagram* feeds, vertical 4:5 for mobile feed, or 9:16 for Stories.
- Resolution: from 1080×1080 pixels for 1:1 square and 1080×1920 pixels for 9:16 format.
- Text on image: The 20% text rule has been canceled, but don’t overload the banner with text. A short headline with the main trigger is enough; details should go in the post text.
Technical requirements for video ads:
- File format: MP4 or MOV.
- File size: The platform accepts files up to 4 GB, but it’s best to keep working files under 100 MB.
- Duration: From 1 second to 240 minutes. In ads, videos from 15 to 60 seconds are used, as longer videos in the feed are rarely watched to the end.
- Aspect ratio: 1:1 for Facebook* and Instagram* feeds, vertical 9:16 for Stories and Reels.
- Resolution: from 1080×1080 pixels for feeds and 1080×1920 pixels for vertical placements.
Dynamic Creatives
To test multiple versions of text and images within a single ad, the dynamic creative feature is used. The Dynamic Creative toggle is enabled at the ad set level.
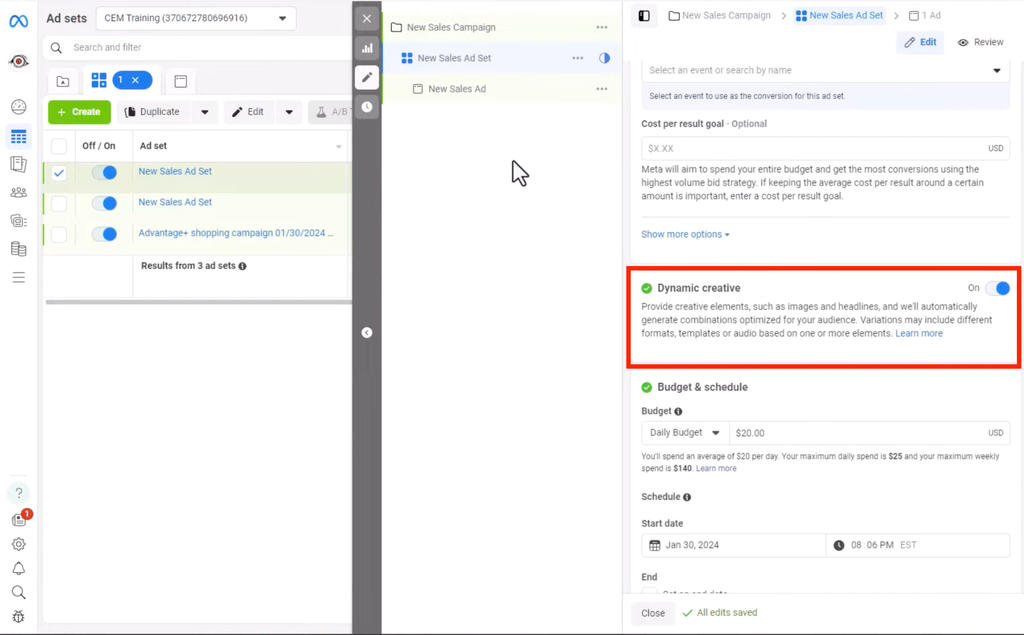
This option allows bulk uploading of elements:
- up to 10 images or videos;
- up to 5 main text variations;
- up to 5 headline variations;
- several call-to-action button options.
The algorithm automatically mixes uploaded creatives, headlines, and texts with each other. As the campaign runs, the system finds the combination with the lowest cost per result and allocates the budget in its favor.
Budget Management: CBO vs ABO and Bid Strategies
Once the ads are ready, you move on to setting the campaign budget. The chosen scheme determines how the system will allocate spend between ad sets and whether the daily limit will be burned through in the first few hours after launch.
CBO vs ABO: Choosing the Right Model
There are two options for budget allocation in the dashboard: at the ad set level — ABO, or at the campaign level — CBO, which is called Advantage Campaign Budget in the interface.
ABO is chosen when you need to test several different creatives or approaches under equal conditions. Each ad set is given its own daily budget — for example, $10–15 each. The algorithm spends exactly this amount on each group and cannot transfer money between them. This ensures all variants get impressions, and the system doesn’t drain the entire budget on a single random creative in the first couple of hours.
CBO is used for scaling or for quickly selecting creatives using the 1-3-1 arbitrage scheme: one campaign, three ad sets, and one creative in each.
In practice, the 1-3-1 setup looks like this:
- At the campaign level, enable the Advantage Campaign Budget toggle and set a total daily budget for the entire setup — for example, $50.
- Create and fully configure the first ad set: set country, gender, age, mobile placements, and add the ad with the first creative.
- To avoid re-entering audience settings, duplicate this ad set twice right in the dashboard. All targeting parameters are preserved in the copies, and you only need to swap out the creative: upload the second version to the second ad set, and the third to the third.
- After launch, the overall budget is distributed by the Meta* algorithm. The system runs all three groups to the same audience, evaluates the performance of each creative, and starts pouring the main spend into the ad set where leads are cheapest.
Auction Timing: Why Launch Is Set for Midnight
The daily budget in Ads Manager is calculated strictly for the calendar day according to the account’s time zone. The algorithm tries to spend the entire set amount by midnight, regardless of when the ads started running.
If you launch a campaign with a $50 daily budget at 8 p.m., the system will try to spend that money in the remaining four hours. Because of the rush, the auction will start raising bids to buy impressions faster. As a result, the budget will be gone in a couple of hours, clicks will be unreasonably expensive, and the setup won’t have time to properly engage the audience.
To ensure even delivery, set the start time to midnight:
- In the ad set settings, go to the “Budget and Schedule” section.
- In the “Start Date” field, set the next day and 00:00 in the time zone of the GEO you are targeting.
- Submit the campaign for moderation in advance—during the day or evening.
The ad passes review, switches to “Scheduled” status, and starts running exactly at midnight. This way, the algorithm has a full 24 hours to distribute the daily budget, bids remain stable, and the CPC stays consistent.
Top Mistakes Beginners Make When Launching Facebook* Ads
When launching their first campaigns, beginners often make the same mistakes in account settings. As a result, the campaign wastes the budget, and ad accounts get flagged for review before generating any leads.
Launching Ads from a Personal Account
Every Facebook* profile has a personal ad account. Beginners often link a card there and immediately start campaigns.
This is not recommended due to account limitations. You can’t create multiple pixels for different sites or grant access to other buyers here.
Moreover, a personal account is easy to lose at the first review: if your profile hits a checkpoint or ZRD, you’ll lose access to ads and all pixel data. Always run traffic only through accounts created within BM.
Only One Admin in BM
After creating a BM, many leave only their main profile as admin. If this account gets banned or flagged for document verification, you won’t be able to access BM or continue working.
To avoid losing accounts, pixels, and fan pages, add a second profile with admin rights right after creating your BM. If something happens to the main account, you can manage campaigns and keep running traffic from the backup profile.
Launching a Campaign in the Evening Without Delayed Start
The daily budget in the account is tied to the account’s time zone and resets at midnight. If you launch a campaign with a $50 budget at 8 PM, Facebook* will try to spend that $50 in the remaining four hours of the day.
As a result, the budget is spent quickly, impressions are squeezed into a short time, and the algorithm doesn’t have time to properly engage the audience. To ensure even delivery throughout the full day, set the start date to 00:00 of the next day in the target GEO’s time zone.
Editing a Running Ad Set
When a setup is working and generating leads at a good price, beginners often try to tweak the ad on the fly: rewriting copy, changing creatives, or suddenly increasing the daily budget.
You shouldn’t touch an active ad set. Any change disrupts the algorithm’s optimization and sends the ad for another review. As a result, the auction starts optimizing from scratch: the cost per lead may rise, and the setup may drop in conversions or stop engaging the audience altogether.
If you want to test a new creative or headline, keep the working ad set running as is. Make a copy of this ad group, change the creative or text in the copy, and launch it in parallel. This way, you’ll keep stable performance on the main setup and test the new hypothesis in a separate ad set.

FAQ
Technically, yes, but for ongoing campaigns it's better to use ad accounts within a BM. This way, you can manage multiple ad accounts, pixels, and fan pages, as well as assign separate access to different team members.
A regular pixel can miss some events due to AdBlock, iOS, and browser restrictions. Conversions API sends data directly from your server to Meta*. If you use both the pixel and CAPI, you need to set up deduplication so that a single lead isn't counted twice.
For standard testing of several bundles, ABO is more convenient. Each ad set gets its own budget, so all options collect statistics. CBO is more often used for scaling or when you want Meta*'s algorithm to distribute the overall budget between ad sets.
Not necessarily. When running traffic to external landings, it's common to leave the audience broad and only set GEO, gender, and age according to the offer's requirements. Meta* then optimizes based on user reactions to the creative and events received via pixel and CAPI.
Edits can disrupt current optimization and send the ad for re-moderation. If you want to test a different creative, text, or settings, it's better not to touch the active ad set. Instead, duplicate it, make changes in the copy, and launch it separately.
*owned by Meta, recognized as extremist and banned in the Russian Federation

Comments (0)